Home Projects – DIY or Call a Pro

You’re sitting on the couch watching your favorite home improvement channel, or you’re browsing the Internet and come across a great home project you’d love to create.

Maybe it’s a raised-bed garden, a beautiful built-in bookcase, or a wall tunnel for your cat.

Whatever it is, you’re probably saying to yourself, “That looks easy. I can do that.”

Hold up.

Before you make yourself into Tim “The Toolman” Taylor with your epic flub in home renovations, ask yourself if you’re really capable of getting the job done.

Here are a few questions to ask yourself:

tools laid out and ready to useDo I have the time?

Home improvement projects rarely go like they should, and can be more time-consuming than they first seemed.

Nothing is as easy as the pros make it look, so make sure you have a realistic time frame in mind, and that you are able to continue the project if something goes wrong.

If you don’t have the time (sorry, you really can’t finish your whole basement in a weekend), think about hiring a contractor.

Do I have the knowledge?

If you have vast experience in plumbing, feel free to change out that toilet or move your shower

You might want to take a class or call a pro if the answer is no.

If you know electricity really well, and understand codes and safety measures, then you can probably safely add lights or plugins without much concern.

However, if you find yourself thinking, “I need to YouTube this,” and it involves gas, fire, electricity or water, the safe bet is to pay someone else to do it, or really invest in a good class that can show you how to do it.

Don’t let your ego be the reason your house floods or burns to the ground!

Do I have the patience?

This aspect is often underestimated, but the reality is that many people get frustrated with home projects and tend to leave them unfinished.

If you’re a couple starting a project, keep in mind that this may either be a bonding experience or a “You’re sleeping on the couch” experience. There tends to be no middle ground.

If you have little tolerance for things going wrong, or for small injuries you may acquire, just hire the professional and relax while someone else does the work.

Which is more expensive: Doing the work, or hiring a professional?

Another important part of deciding whether to DIY or outsource your project is deciding if you can afford it.

Strangely enough, it often ends up being more expensive to do it yourself, as you may buy more product than you need, or you may mess up entirely and have to go purchase items again.

Also, you’re spending your time and energy, and time is money! Often, a contractor can get the job done in half the time you can, and they get discounts on products and appliances they need to get the job done.

While it’s maybe a little less exciting than doing it yourself, you may save yourself money in the long run. And you’ll be supporting local business by doing so!

 

How to Restore Your Home’s Curb Appeal

multi-story lake home on the waterfrontYou know that great curb appeal your house had when you first bought it? Is it looking a little haggard?

Maybe the paint is fading, or peeling. The gutters are bulging from dead leaves or this winter’s monsoon.

Maybe the porch has settled, and is drifting away from your house.

There are lots of things that can happen to a house that make it look, well, not so great. Here are a few quick tips to get your house back into curbside appeal mode.

Under Pressure

Power wash your house.

Rent a power washer, buy one, beg a friend or relative. Whatever you have to do, power wash the exterior panels, siding, or bricks and windows all the way around your house.

This removes the stuck on grime, and also gets rid of leaves, webs, and general yuckiness that tends to stick around.

Power washing is really quick fix to make your house sparkle on the outside.

Paint the House Red

Well, maybe not red unless you’re really going for a bold statement.

But if you notice your paint is peeling or fading, invest in a paint sprayer, or hire a professional.

Do touch-ups throughout the year, or just plan on one huge project in the summer when it’s nicest.

A fresh coat of paint has the power to make a house look brand-spankin’-new.

Get Your Head Out of the Gutter

Clean your gutters, people!

Stuffed gutters can cause structural damage, leaks and costly repairs if your gutters get so heavy they fall off. It happens.

Instead of letting it get to this point, clean your gutters out especially during spring and fall when all the new or dead leaves are falling from the trees.

If notice a bird’s nest or other blockage, get up there and clean it out. If you are not able to, hire someone that is.

Trim The Bushes

Landscaping is a great visual addition to a spruced up home exterior.

If you already have landscaping, maintain it. Trim the bushes, trees, or hedges and keep the flower beds weeded and grass mowed.

It’s amazing how much nicer a house looks when it’s got a well-kept yard.

If you have dirt instead of grass, think about investing in sod, grass seed, or having a landscaper do it all for you.

Clean Up

Don’t be that neighbor; get your car off the lawn, your trash bags off the porch, and your kids toys off the sidewalk.

Tidy up after you have a party on the lawn, and don’t let junk accumulate on your property.

It sounds simple, but so many people underestimate how much nicer their house looks from the outside when people aren’t greeted by a lot of junk at the curb.

Don’t Forget Your “Shore Appeal”

The term “curb appeal” refers to how your house looks from the street, or curb.

With a lake home many times the “front” of the house may be oriented towards the lake.

If this is the case make sure you make the appropriate side of the house your priority. Also, include your dock into the equation.

Make sure that any year-round furniture is secured, there is no clutter such as life vests or fishing supplies, and that your boat is secured and orderly.

Hopefully after reading these tips, you’re motivated to get out there and clean!

Do the easiest steps first, and build up to the big projects, like repainting or landscaping. Then, you can enjoy the view every time you pull into your garage or driveway.


5 Easy Home Maintenance Tips for Fall

Many people assume that major preparations are needed for winter, and every other season is mild enough that your house can wait until temperatures drop. However, if you want to keep your workload down and prevent expensive repairs or damage, here are some things that should be on your home maintenance checklist this fall.

Lake home on the water during autumn | Lake Homes Realty

Image courtesy of Cindy Etta via Pinterest.

Gutter Snipe

Fall is obviously synonymous with leaves falling, raking, leaf blowing and general yard upkeep.

While you’re focusing on your yard, the first thing on your fall home maintenance checklist should be to look up at your house and ensure that your gutters and downspouts are cleared of leaves, debris and any blockages.

If you leave the leaves in the gutters until it starts to snow, your gutters won’t be able to do their job.

Do yourself a favor, grab a ladder and some gloves, and clear the detritus from the gutters and downspouts.

Leaf It

Fallen leaves in front of home during fall | Lake Homes Realty

Image courtesy of Angie’s List.

When you rake up all those leaves, and feel like you want to scream, keep in mind that those leaves serve a purpose.

If you have a garden, you can chop the leaves and spread them as mulch, providing a lot of nutrients for next year’s soil.

If you don’t have a garden, and want nothing to do with the leaves that clutter your yard, put them on the curb or take them to a community garden.

Someone could use them!

Pack It Up

As the end of the season approaches, you won’t be needing to water your lawn, and there will be several times where frost coats your lawn and car in the morning.

The next thing on your home maintenance checklist should be to turn off the water spigot, unwrap your hose, and put it away.

Also make sure you blow your sprinklers out, or call the landscapers to do it. You don’t want water in the pipes when your area has its first freeze.

Heat Things Up

Lake home living room with burning fireplace | Lake Homes Realty

Image courtesy of OneKindDesign.

Before winter truly arrives, test out your furnace, and make sure nothing is wrong with it.

Few things are worse than waiting until it’s freezing outside, only to realize that your furnace is out of order.

If you have a fireplace, make sure it’s structurally sound, and make sure nothing is inside the chimney that would prevent smoke from clearing out.

Hunker Down

In general, use autumn as preparation for winter.

If you live in an area full of wildlife, make sure your house, and outbuildings, are sealed up tight as many creatures will begin seeking refuge when temps are still tolerable.

Stock up on food if you live in a very intense climate.

Make sure your windows and doors are sealed tightly, so you can conserve energy and heat!

Sure up the Shoreline

Vermont Lake Home on Shoreline during autumn | Lake Homes Realty

Image courtesy of BucketList127.

Many lakes have seasonal draw downs, meaning the water level will be significantly lower in the cooler months.

This makes for the perfect time to work on any seawall damages that may need repairs.

Many times this is best left to a professional, and since this is the optimal time to make repairs be sure to book their services ASAP.

While this list is far from exhaustive, it should serve as a good reminder to never leave your house unsupervised until winter.

By the time you realize there is a problem, it will be too late, and all the service pros will be booked until the beginning of spring!

Save yourself time and money now, and get ready for fall and winter the right way.

A Beginner’s Guide to Painting a Room

Painting a room yourself can be easy if you go about it the right way. It can also be a lot of fun.

Changing a room’s color, or simply applying a fresh coat can help a space look both clean and inviting.

This is also an alternative to buying new furniture or rearranging the furniture you already have if you are wanting to spruce up an area of your home.

If you have never painted before, never fear! Here are some tips to help ensure that you get great results:

green wall with ladder

  1. Begin with a clean wall. Make sure to wash off any dirt, grease, or anything that shouldn’t be there. If you are using soap to clean the walls, be sure to go back over those spots with plain water so that you don’t leave soap residue.
  2. Sand paper any previously puttied spots, and use putty in order to have a smooth wall. If your walls have any holes or broken areas, be sure to repair those before you begin painting.
  3. Use trim tape to save your floors and windows, or anything else you don’t want paint on. There is special painter’s tape made for this purpose; it is easy to apply and peel off. This tape can also be applied for a long time without peeling off any existing paint on your wall, like normal masking tape might. Paint tape helps to protect the paint from getting all over as well as assists you in creating the perfect line.
  4. Prime the walls for maximum coverage and the best look. Priming the walls means you are just preparing them for the actual color that you will paint them. If you are painting over a dark colored wall with lighter paint, will need primer to ensure you an enhanced, even color. It is advised that painters use primer for lighter colored walls as well.
  5. Use a brush AND roller. In the smaller and hard to reach areas, you will need to use a paint brush. This is where the paint tape comes in handy as you are painting in those crevices and corners. Tape and brushes are also handy when it comes down to painting along trim. For most of the wall, use the roller brush to cover large areas in a shorter amount of time. Roller brush strokes also come out much more smoothly and evenly, if done properly.
  6. Lay the roller on the wall with sweeping strokes. Start in the middle of the wall, and roll upward and then down at a slight angle while applying pressure. Be sure to not touch the ceiling or anything you don’t want paint to be on. While you are painting, make sure to do it quickly, as you don’t want the paint to build up or create roller marks.
  7. Don’t forget to wrap your brush and cover paint if you take a break, even for just 10 minutes. Be sure to use a plastic bag, or plastic wrap, in order to keep your brush from drying out. Also, be sure to put the lid back on the paint can when you aren’t pouring it in order to avoid drying as well.

Painting a room may seem like a daunting task at first, but follow these tips, and you will be perfecting your painting techniques in no time!

And don’t forget to check out our article about selecting the right paint pallet for each room!


Stains Between Your Tile? How to Clean or Replace Grout

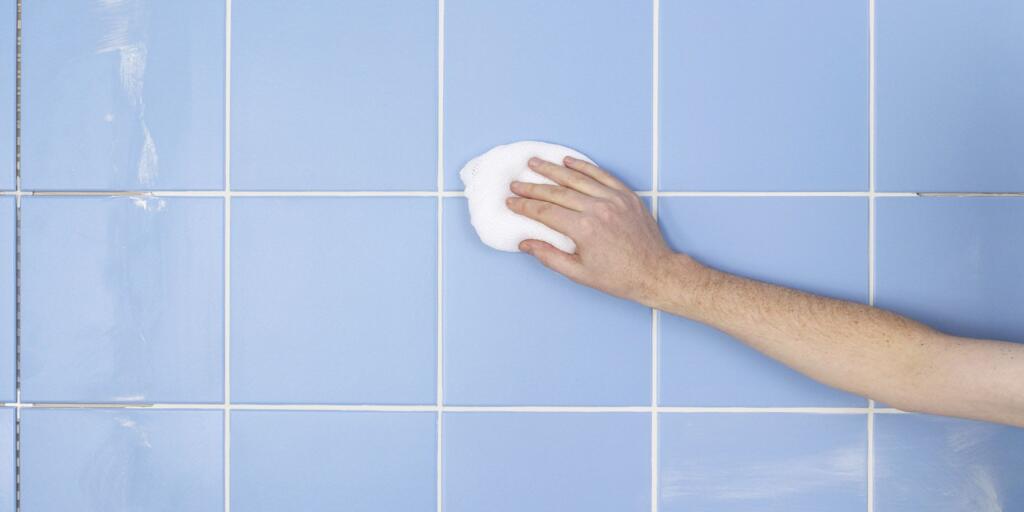
Person scrubbing dirty grout tile
Photo Courtesy of Woman’s Day.

Grout is a mixture of cement, water, sand, and color. At times, it can include finely ground gravel. This ends up being a sticky substance that comes in the form of powder. It is used to fill in gaps in the bathroom. These gaps include those around walls, countertops, floors, and tiles. Although it has a function, it can also be decorative. If you find that your grout is discolored or is chipped in anyway, here’s how to clean dirty or stained grout in any room.

Clean Up The Grout

Dirty or discolored grout can be quite ugly. The wonderful news is as long as it is in good shape, then you can restore it.

In order to bring back the lustrous color, or just to make it look nice and new, there are cleaning procedures that you can follow.

Firstly, you will need to get a bucket with warm water. Use a gentle scrub brush to scrub the grout using a grout cleaner. Pay it dry with a cloth. Allow it to dry thoroughly, and then it should look new.

If you do not feel like scrubbing the grout, you can use a grout pen. If this does not seem to help the appearance, then you will need to replace it.

Remove the Old Grout

You are able to remove the grout by hand; however, it is suggested to use a power tool to make it a lot easier for you. It will also make the project go a lot quicker. If you opt for manual, then you will need a special tool for grout removal.

You can use a triangular carbide blade or a screwdriver to pry it out of place. This can be exhausting and troublesome. If you should chose the power tool, then you will need the reciprocating saw with the grout removal accessory.

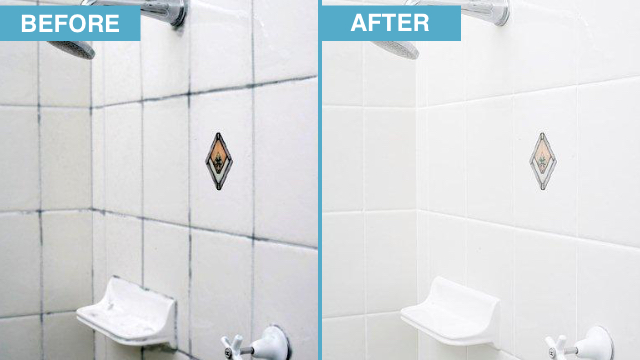
Before and after of bathroom dirty and stained tile
Photo courtesy of HireRush.

Re-Grouting

You will need to mix the grout per the package instructions. Make sure to follow the manufacturer’s instructions very closely. No matter if you chose to use sand or un-sanded grout, you will need a bucket, plastic towel, and a grout float.

Once the grout is mixed, you will need to shovel some of the grout onto the grout float and then push it into the gaps.

Scrape the excess away in order to have a level grout. Use a warm, wet cloth to wipe off the grout from the tiles. It will take 24-48 hours to fully dry. Till then, only walk on the tile surface.

Grout can make or break the look and feel of the bathroom. Keep it clean with a special cleaner and maintain it well.

If you do not maintain it, then you will have to re-grout the whole bathroom in order to keep to the clean look of your bathroom.

For more home improvement and DIY tips for your home, visit here.

Quick DIY Home Repairs to Increase Your Home Value

If you are looking for cheap and easy ways to enhance your home, then you will love the information listed here. There are some DIY home repairs listed that will increase the speed that your home sells.

Kitchen

Kitchen designThis is one of the rooms in the home that can make or break the sell. Even if it is a smaller kitchen, it can be perceived as “comfortable” and not small. You can redo the kitchen very cheaply.

Make sure that you offer a fresh coat of paint. It is best to use light colors to brighten the kitchen up. When it comes to your pantry or cabinets, organize them to show that it can be spacious. You can even change out the kitchen faucet to make it look fresh for a minimum price.

Appliances

Although it may not be a big deal for you, appliances that do not match can put a buyer off. You can order new doors or panels. You can make the appliances match each other to offer an improved appeal.

This includes appliances like the microwave, dishwasher, refrigerator, and other appliances that are included in the kitchen.

Bathroom

Bathroom designBesides the kitchen, the bathroom is another focus point when a homebuyer is inspecting a potential home. You can upgrade the bathroom or make it look fresh with very little money, so do not worry too much about cost.
If the flooring is not fresh looking, it can be fairly cheap to retile the floors. Bleach the tub, the toilet, and the sinks. Get rid of any orders or stains. Maybe even consider re-grouting them.

Flooring

Sure, you may have installed that carpet a few short years ago; however, it never hurts to give it a deep clean! Rent a carpet cleaner and clean it well. It will rid them of smells and it will bring new life to them.

If you have hardwoods underneath your carpet it may serve you well to rip up the carpet and refinish the wood underneath for an updated look.

Storage

Typically, older homes do not offer a lot of storage space. However, you can remedy this by installing shelving or building a closet for a small price.

Fixes are easy to do when you are determined to sell your home. Small things like fresh paint and getting rid of a hole in the wall can spruce up the home enough to sell it fast.

How to Build a DIY Fire Pit

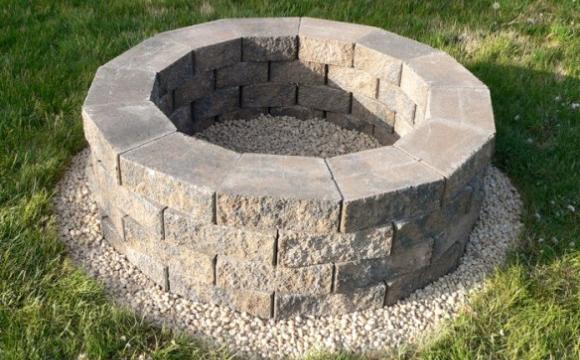
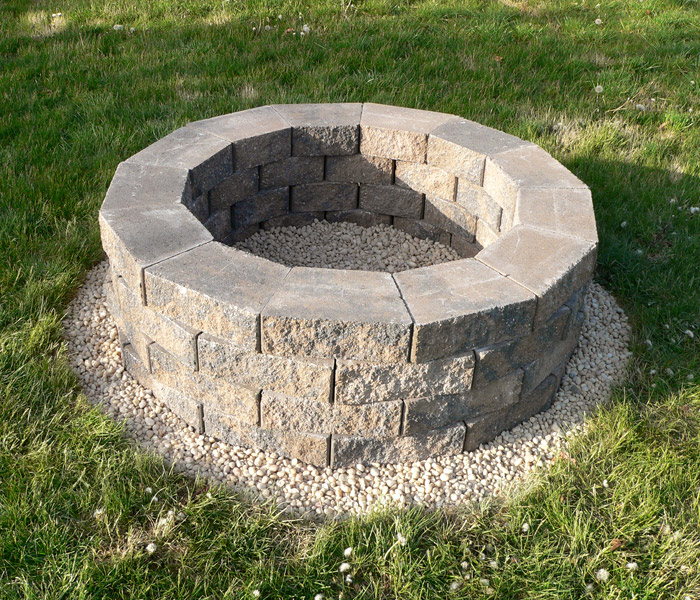
retaining wall blocks firepit diy

Building your own DIY fire pit is a great way to bond with your friends and family when you are hanging out in your backyard.

You can sit around the fire and enjoy it, but first, you need to know how to build one. There are several steps you need to take in order to build a proper DIY fire pit. Keep reading to find out how you can build a fire pit to enjoy at home.

Preparation

There are first a few things you must do before you get started. First, you need to make sure you have all the tools and materials handy before you start working on your DIY fire pit. According to a number of estimates, these items should cost you no more than $200. Here are those materials:
• Gravel
• Sand
• 52 retaining wall blocks

Optional items include a steel ring to line the inside of the pit and a metal grate to cover the top of the pit once it is built.

Dig Your Hole

You will need to dig a hole approximately 2 feet wider than you want your fire pit to be which is about 4 feet across. Make the area as level as possible. You will need about 4 inches of gravel and 4 more inches of sand to help make sure that this area is completely level.

Lay the Blocks

Now it is time to assemble the stone layers. You can use a steel ring that holds it into place to make sure that all of the layers are round and the exact same size.

If you do not have a steel ring, make sure the bottom layer is as perfectly round as possible. The next few layers will lay on top of the base. The middle of the pit will typically be about 32 inches around.

…Stack More Stone

Continue laying the blocks in a circle until the DIY fire pit reaches your desired height. Depending on the size of your fire pit, it should take approximately 10-15 stones for each layer all the way around.

If you plan on cooking over the fire pit, it probably will be a good idea to buy a metal grate to cover the fire pit. This way, if someone accidentally drops a hot dog or marshmallow over the fire, it can still be grabbed and eaten.

There are numerous other fire pit designs that are more complex and ornate that can be found for free online.

8 DIY Projects that Can Increase the Value of Your Lake Home

If you’re lucky enough to own a home by a lake, you know how peaceful sitting looking out over the water can be. You’re also likely aware that such homes generally have a steady stream of people interested in buying them as soon as they go on the market.

Although a lake home can be prime real estate, there are several things you can do to both enhance your enjoyment of your property as well as increase your home’s value when it comes time to sell it. The good news is that you don’t have to spend a fortune to reap the benefits.

The following are 8 DIY projects that can increase the value of your lake property:

1. Improve your landscaping

Although the lake water can be captivating, your home will increase in desirability if you spruce up your landscaping by adding trees, shrubs, and bedding plants to your property. The concept of curb appeal applies to lake homes as well as suburban ones.

2. Give your kitchen a cheap facelift

You can make your cottage kitchen look more current without having to spend a lot of money. A fresh coat of paint on the walls and the cabinets as well as new drawer pulls and cabinet handles can update your kitchen for less than $100.

3.  Add an outdoor seating area

Every lake home should have an outdoor seating area. However, you don’t have to spend a lot of money on a multi-level deck to be able to enjoy the outdoors. Pouring a small, concrete patio can be a DIY project. Or, you can carve out a secret seating area with a garden bench or pergola and add a stone or brick path leading from the house.

Swapping faucets 4. Swap out the faucets

Getting rid of tired bathroom and kitchen faucets are another inexpensive DIY to update your rooms. Modern faucets not only are less likely to drip or leak, but they add a sleek look to your rooms.

5. Update your lighting… inside and out

Replacing your old lighting fixtures is an easy and affordable way to add value and beauty to your lake home. And, don’t stop with the inside lights, solar lights lining a pathway to the water and/or well-placed spot lights that accent your planting can add intrigue and allure to your landscaping.

6. Anything that saves energy

According to the Residential Energy Services Network, you’ll boost your home’s property value by $20 for every dollar your improvement saves on your annual energy costs. You don’t have to invest a lot to make a big impact. Things like weather stripping, additional attic insulation, and a blanket for your water heater can add hundreds to your home’s value.

7. Replace your front door

According to “This Old House” magazine, replacing your front door and door hardware is one of the best ways to add value to your property and make it more attractive to potential home buyers. They maintain that home buyers make up their mind about a property in the first seven seconds. That means your entrance way needs to look sharp.

8. Install new flooring 

DIY installing flooringThe right flooring can pay you back double your investment when it comes time to sell. This is especially true with lake homes, where sand and water can take their toll on traditional flooring. Good choices for lake homes include vinyl flooring, which is virtually impervious to water and cleans up easily.
Remember: you don’t have to spend a fortune to enhance your lake home’s property value. A little paint, some well-placed trees and shrubs, an outdoor sitting area, and some new lighting can take your home from mediocre to marvelous without breaking your budget.

6 Home Security Tips for Your Lake Home

Lake homes are a great way to take the break that you deserve from the stresses of daily life. However, when the time comes to return to your main home, instead of feeling rested and rejuvenated, the thought of leaving your second home unattended and vulnerable to problems ranging from burglaries to power surges can be its own source of anxiety.

Here are six simple home security tips that you can take to provide the security necessary for your lake home so that it remains a stress-free retreat.

Make it Look Lived-In (When You’re Not Living In It)

Home Security PanelA dark home with unkempt grass and old mail piling up on the front porch is a sure sign to robbers that your home is unattended. Make it look like somebody is home. You can get some help with this step by asking a neighbor to help look over the house.  MSN Real Estate recommends giving your spare key to a trusted neighbor so that he or she can bring in any mail.

If you plan to live there more frequently, you can request that the US Postal Service office hold your mail while you are away from the lake. Ask your neighbor to periodically water the plants and mow the lawn.  If you have a driveway, suggest that they park their car there at times. Try hosting a BBQ dinner party for them next time you’re in town to make the agreement extra enticing.

Put on a Light Show (When You’re Not There)

A great way to mimic the look of a lived-in home is by using lights.  While The Independent Traveler urges against leaving lights on the entire time, a better way to get a lived-in look is by investing in some timers. Light switch timers will create the natural effect of you periodically turning the lights on and off during the day and at night, even when you’re not around. MSN Real Estate suggests installing motion-sensor lights outside to create a similar effect.

Check Your Windows and Doors (Before You Leave)

Even if your vacation home door is older, there are a couple simple ways that you can make it more secure it up while maintaining a rustic look. Invest in a good lock. MSN Real Estate recommends purchasing a Grade 1 or Grade 2 deadbolt, both of which you can install without the help of a locksmith.

Depending on how old your home is, you may consider replacing your strike plate, as well. Brass strike plates are an affordable replacement option. You can make your windows thief-proof by replacing them with types that cannot open more than six inches.

Once your windows are updated, the final step is to check your curtains.  While it may be tempting to keep them closed while you are away in order to prevent your home from being visible to passersby, The Independent Traveler suggests leaving them open to make it appear that you are at home.  Be sure to store your more valuable items in a windowless room.

Invest in a Temperature Sensor (Sooner Rather Than Later)

During the cold winter months, the potential for pipes to freeze is an added concern. Invest in a temperature sensor alarm system. These range in function, but generally monitor the temperature of your lake home and alert you via phone when abnormal conditions are detected.

Another home security tip The Independent Traveler recommends is that you ask a trusted neighbor to stop by periodically to check that water is running completely in the faucets. Also be sure to show the neighbor how to shut off your water main in the event that the pipe bursts.

Avoid Social Network Updates

As you pack up to leave the cabin, although it may be tempting to share photos online of your most recent waterskiing accomplishments and the new hiking trail that you explored, be wary of how much you say.  Tech-savvy burglars may take the photos and descriptions as an indication that your vacation has come to its conclusion and that your home is about to be unattended.

Unplug Appliances

unsplashA final step you can take is to remember to unplug your appliances, including toasters, computers, printers, televisions, and lamps.  It takes very little time, but will make a huge difference by helping you to avoid future power surges.

With these home security tips, you can rest assured that your lake home will always be a safe haven, even when you’re away.  And despite the monetary cost of making your home more secure, imagine the amount that you will save when you avoid the otherwise daunting effects of a robbery, pipe burst, or power surge.

Now you can look forward to your next vacation as a way to shed unwanted stress and remain relaxed, even when it’s time to leave the lake behind.