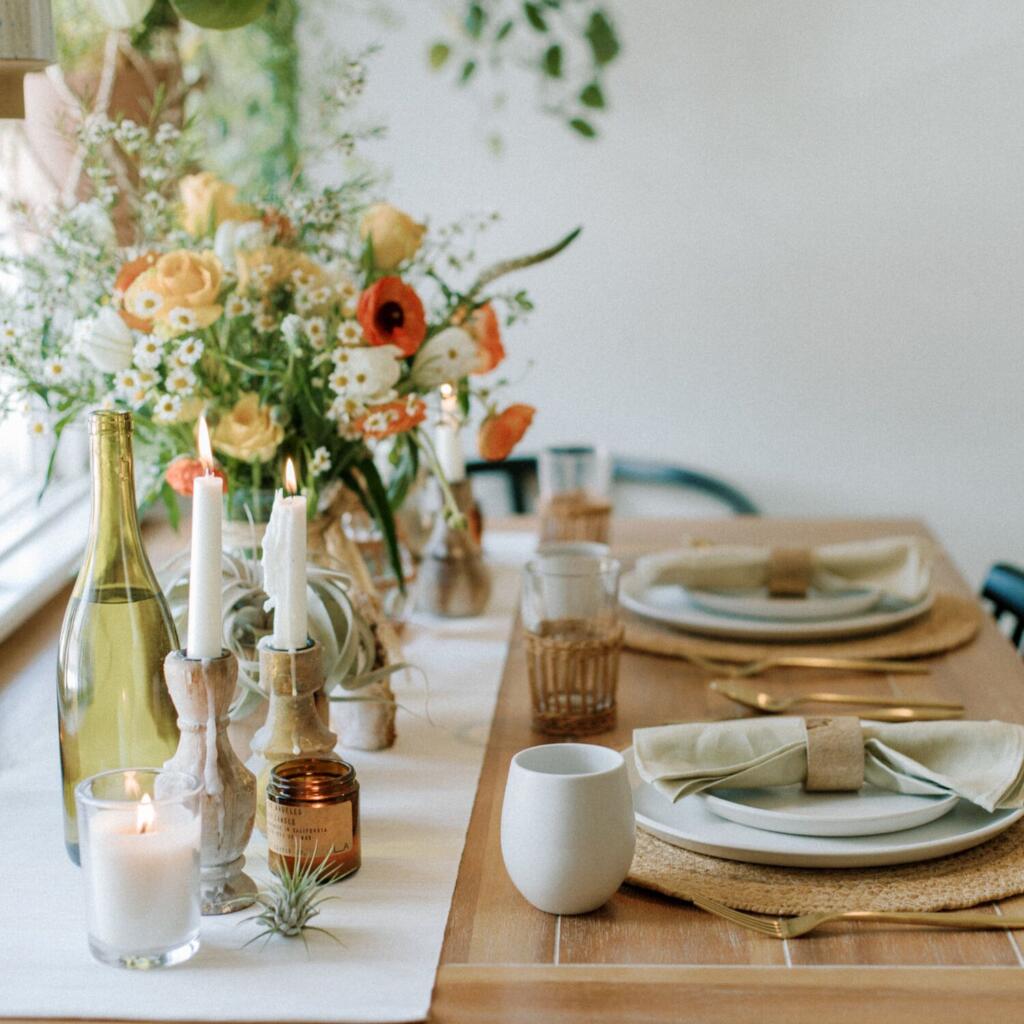
Tabletop Centerpiece Ideas

Photo courtesy of My Domaine

When hosting guests at your lake house, creating a beautiful centerpiece can do wonders for your space. But instead of buying an expensive decoration, you can easily create a DIY centerpiece that shows off your creativity and personal style. If you’re seeking ideas for a sophisticated dining table aesthetic, we’ve got you covered.

The Tin Can Succulents
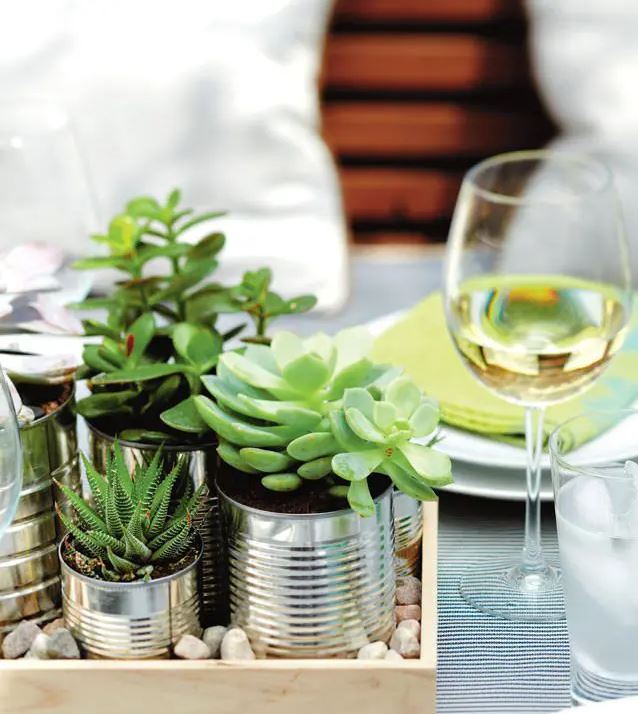
Photo courtesy of Balcony Garden Web

Designing your centerpiece around plants is a great way to foster a biophilic aesthetic in your home. Especially with succulents, you can add greenery to your home in a stress-free way. These plants are low-irrigation, making them super easy to care for. Add a few upcycled tin cans, a tray filled with decorative rocks, and you’re all set.

The Leafy Greens
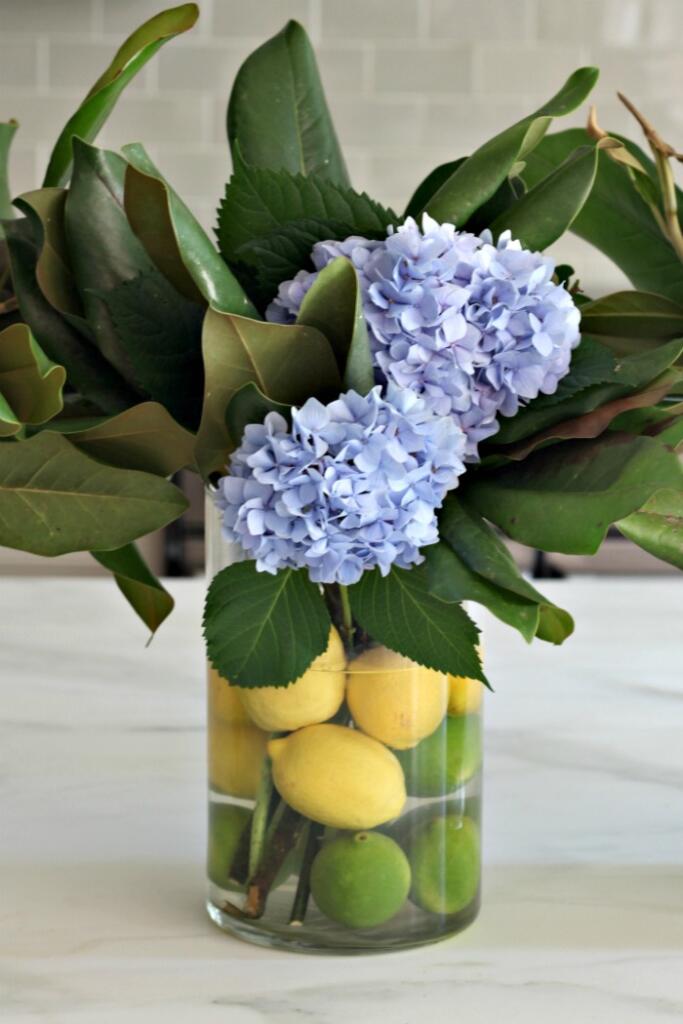
Photo courtesy of Southern State of Mind Blog

To create a nature-based centerpiece, you don’t need to look further than your own backyard. Using various clippings of leaves from your lakeside property, you can create a beautiful centerpiece that evokes a natural aesthetic. Quick to assemble, you can replace your foliage every so often with new hand-picked plants. For an extra unique flair, try adding some lemons and limes to the base of the vase. It’s also a great opportunity to dig in your craft basket for a beautiful ribbon to wrap around the vase.

The Candle Corner
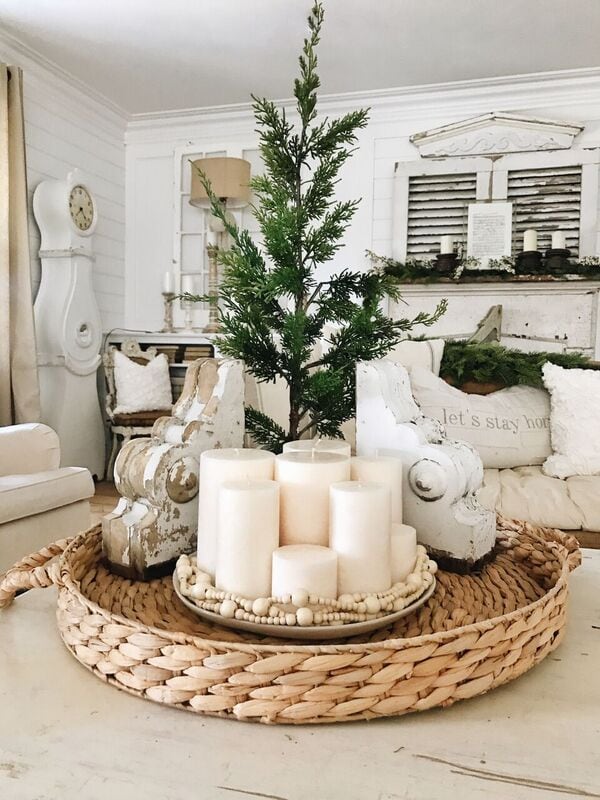
Photo courtesy of Liz Marie

Nothing evokes a sense of warmness, comfort, and overall hygge quite like a collection of candles. Rather than arranging candles sporadically in various corners of your house, try compiling them to create an elegant centerpiece for your table. This DIY idea from Liz Marie’s blog features a pottery tray with wood bead garland, topped with nine pillar candles of varying heights. The combination of various materials such as wood figures, a ceramic plate, and a woven tray table creates a dynamic look.

The Fruity and Delicious
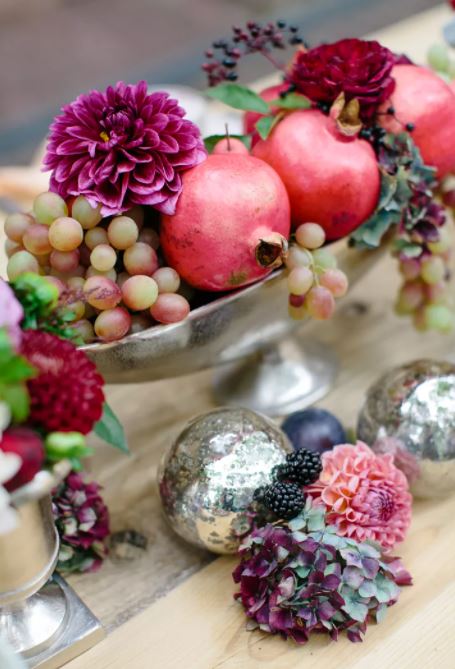
Don’t underestimate the decorative power of that fruit bowl sitting in your kitchen. With the right amount of creative touch, fruit bowls can make lovely tabletop centerpieces. For a pristine look, get a smooth, white, or silver bowl with a wide base. Then, pair jewel-toned fruits with a variety of sizes but with similar coloring. For example, plums and pomegranates complement each other well, with their dark reddish shades. For a more interesting look, you can also pair it with florals from your garden.

The “I Want Candy”

Photo courtesy of Pinterest

Want to create a good-looking centerpiece with a whimsical touch? Try filling a glass jar with Hershey’s Kisses wrapped in silver. While unconventional, this idea creates a fun and inviting atmosphere, and the silver wrappers create a cohesive, shiny look that goes with any lake house aesthetic. The best part? Your guests will always have a sweet treat to munch on. 

Of course, these are just a few ideas. When it comes to creating your own centerpieces, the options are endless. Use whatever materials are at your fingertips — greenery, used mason jars, fruit, flowers, craft paper — and get creative! Your interior design style is personal, and it’s all about cultivating the right look for you!

DIY Bird Seed Tips

Photo courtesy of Andrew Dernie / Getty Images via The Spruce

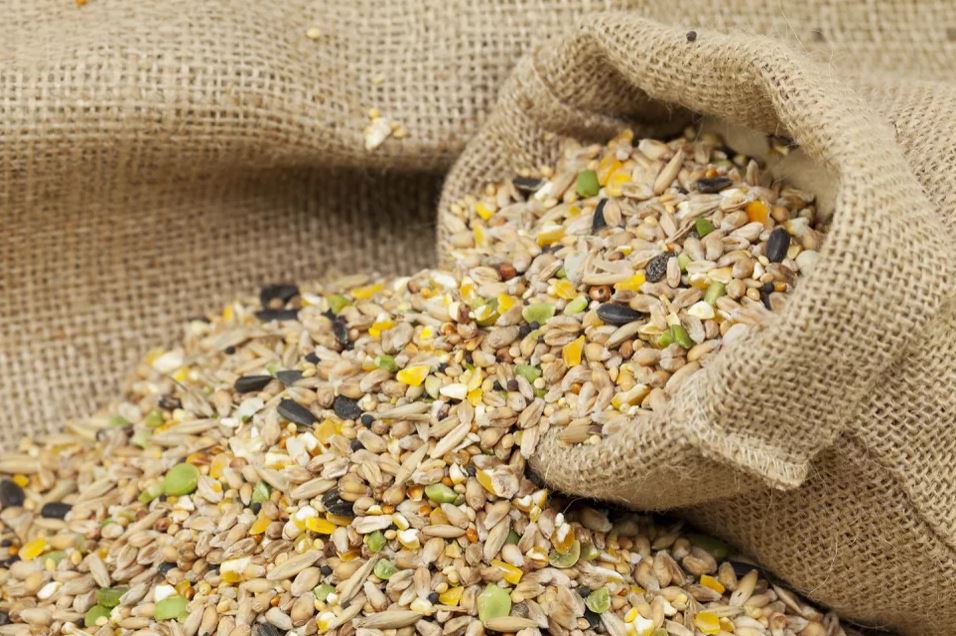
In summertime when food is abundant, birds are more likely to scavenge for their own meals. However, resources are scarce during the cooler months. So, this season, birds could use a little assistance finding a reliable sources of food. Installing a bird feeder in your backyard is a great way to attract birds to your lake home and enjoy birdwatching on a regular basis. But when it comes to filling those feeders, things get trickier. If you decide to make your own bird seed (a fun craft project for everyone), how do you know what the “dos” and “don’ts” are? Which types of seed will attract a wide range of birds? At Lake Homes, we’re here to help. Check out these tips for creating DIY bird seed this winter!

Essential Ingredients

Photo courtesy of Bird Watcher’s Digest

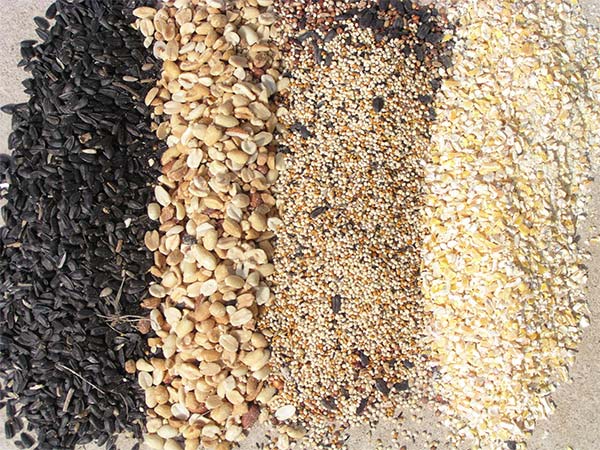
The key to creating a delicious homemade birdseed recipe is including nutritious ingredients that birds need in their diet. Luckily, these essential components are inexpensive! You can usually find them in bulk at most grocery stores. For instance, peanuts are beloved by birds and provide them with enough protein for their diet. Besides peanuts, any good birdseed mix will include sunflower seeds. Whether hulled or in the shell, these seeds are highly nutritious. Specifically, black oil sunflower seeds have high-fat content, as well as protein and fiber, which is perfect for birds.

Extra Ingredients

Photo courtesy of This is My Garden

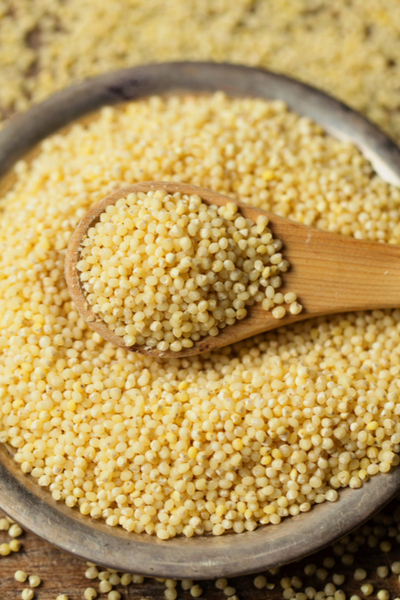
While key ingredients like peanuts and sunflower seeds may be the star of the show, supplemental ingredients are necessary to round out the nutritional value of your DIY bird seed. First off, white millet (as opposed to red millet) is an excellent source of protein, calcium, magnesium, oil, and phosphorus. Similar to white millet, cracked corn is a great high-protein ingredient. As opposed to whole corn, cracked corn is easier for both small and large birds to consume. Just be sure to use limited amounts! Too much cracked corn can absorb moisture and dry out your other ingredients. Finally, an ingredient often excluded from store-bought mixes is dried fruit. A handful of raisins (white or red) can attract a host of birds to your backyard who might not otherwise hang around.

Ideal Ratio of Ingredients

Photo courtesy of Growing Family

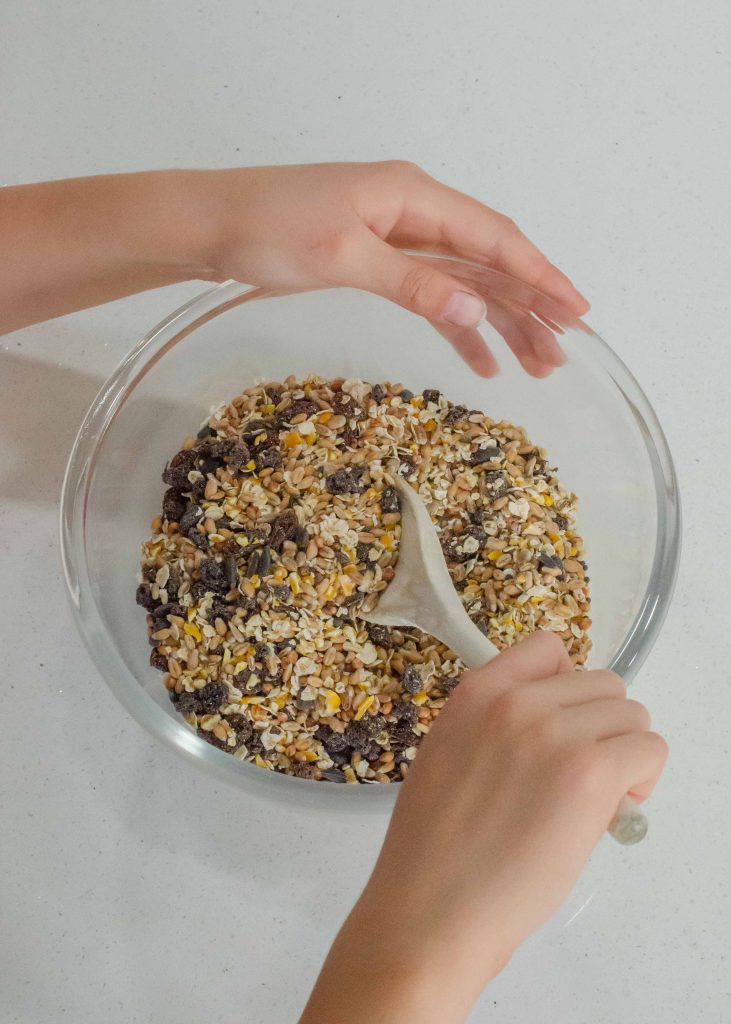
As one might expect, the essential ingredients (e.g., peanuts and sunflower seeds) should be prioritized in these DIY bird seed recipes. For a standard recipe option, include one cup of peanuts and sunflower seeds and ½ cup of extra ingredients. This ratio excludes dry fruit, in which a little bit (just a handful) goes a long way.

Ingredients to Avoid

Photo courtesy of Powell Feed, LLC

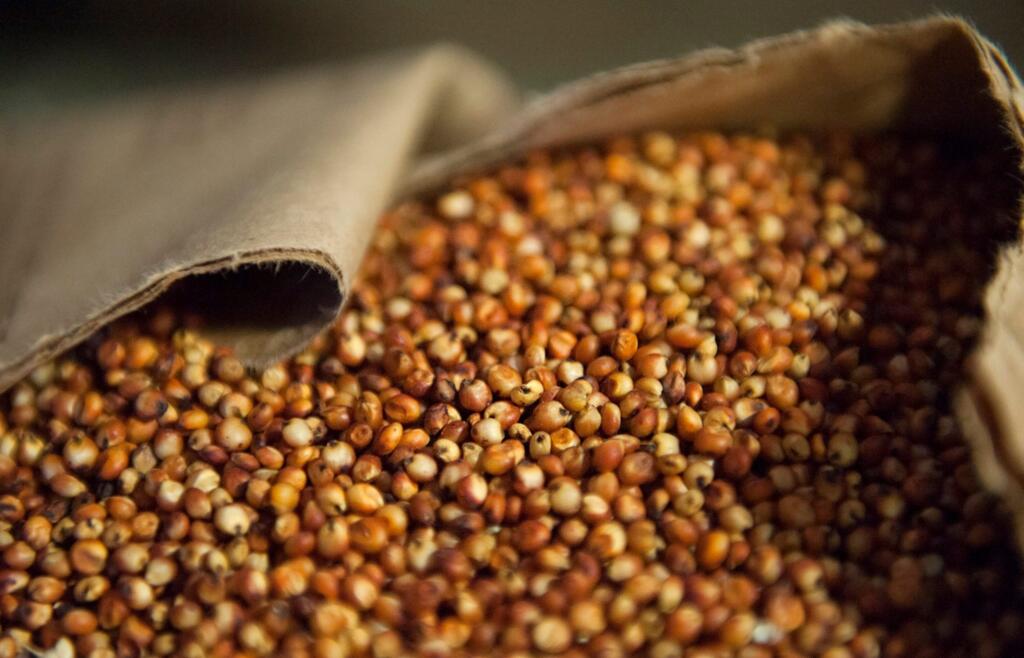
Although birds are known to devour a host of seed-like ingredients, there are several that you’ll need to avoid when creating your own DIY bird seed. Among them is milo, a filler grain. This large, reddish seed with a round shape is less appealing to most birds. A few select species, such as doves, enjoy eating milo, but including it in your recipe will turn the majority of birds off to your backyard. Canary seed, grass seed, oats, wheat, and sticks are other bad ingredients to avoid. One of the benefits of creating DIY bird seed is that you can avoid these “bad” or “filler” ingredients that are often included in cheaper store-bought mixes. In fact, so many mixes contain more milo than other, healthier, and more appealing ingredients. Making your own birdseed will ensure that birds are attracted to the food you’re offering! 

With these tips, your backyard is bound to be a hotspot for birds this winter!

Popsicle Recipes for Summer 2021

Photo courtesy of Jessica Gavin

During the summer at the lake, there’s nothing like a frozen treat to cool you down. Specifically, popsicles are always a crowd-pleaser. Enjoyed by kids and adults alike, these single-serving handheld desserts are the perfect cure for any overheated person with a sweet tooth. While store bought popsicles like Flavor Ice and Bomb Pops are always a classic, using popsicle recipes to make your own homemade treats is even more fun. Check out these DIY recipes for summer 2021!

Raspberry Popsicles

Photo courtesy of Wanna Come With?

Let’s start out with the simplest recipe. These raspberry popsicles use only two ingredients to get the job done. Icy, fruity, and delicious, the simplicity of these treats is guaranteed to make this dessert a household staple in your lake home. 

Ingredients: 

  • 1 cup of raspberry juice 
  • ½ cup of raspberries 

Directions: In a blender, blend these two ingredients together until the mixture is smooth. Then, pour into the molds and freeze overnight.

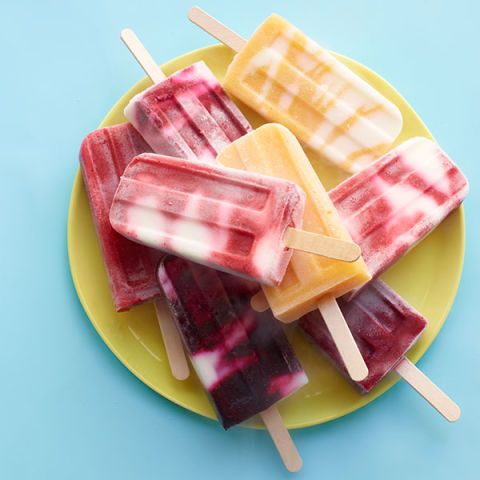
Fruit and Yogurt Swirl Pops

Photo courtesy of Country Living Magazine

If you’re looking to stay on the healthier side, these fruit and yogurt swirl pops are perfect. They’re quick, easy to make, and use the same ingredients as you would use in a typical breakfast of yogurt and fruit. More creamy than icy, these swirl pops are are filling — but in a way that’s more refreshing than hearty. 

Ingredients:

  • 1 pound of frozen or fresh fruit 
  • 2 tablespoons of granulated sugar (if you’re using fresh fruit) 
  • 2 cups of vanilla yogurt 
  • Ice pop molds 
  • Ice pop sticks 

Instructions: Puree the fruit and sugar using a food processor until it’s smooth. Pour it into a resealable bag or squeeze bottle. Spoon the yogurt in and squeeze the yogurt and puree mixture into the molds, creating swirls. Insert ice pop sticks and freeze overnight.

Strawberry, Basil, and Honey Paletas

Photo courtesy of Taste of Home

In Mexico, ice cream shops are called paleterias and the frozen treats inside are known as paletas. Similar to a popsicle, Mexican paletas are made from natural fruits such as strawberries and mangoes. Although you can make milk-based paletas, this recipe is on the fruitier side. The additional ingredient of fresh basil makes a fun twist on this classic dessert. 

Ingredients: 

  • 2 pounds of strawberries 
  • ⅔ cup of fresh basil 
  • 1 tablespoon of lime juice 
  • ½ cup of raw honey or sweetener 
  • Ice pop molds or paper cups 
  • Popsicle sticks 
  • Blender 

Instructions: chop all strawberries, removing the green stems. Set aside six strawberries. Place the chopped strawberries, basil, and lime juice into a blender and blend until smooth. Add the sweetener to the mix and blend again. Finally, put the remaining strawberry slices into the mold and add the fruit mixture. Cover mold, insert sticks, and chill overnight.

Rainbow Popsicles

Photo courtesy of The First Year

Even though Pride month is over, that doesn’t mean we can’t enjoy rainbow popsicles all year round! This multi-layered popsicle recipe is as vibrant as it is delicious. However, it’s worth noting that this one is particularly involved. You’ll need several different types of fruit, so this one is perfect after a trip to the farmer’s market! 

Ingredients 

  • For all layers: ½ cup Greek yogurt (plain or vanilla) water for blending 
  • Red layer: 1 frozen banana, ½ cup frozen raspberries, ½ cup frozen strawberries
  • Orange layer: 1 frozen banana, ½ cup frozen peaches, 1 small orange, ¼ cup frozen mango 
  • Yellow layer: 2 frozen bananas, 1 cup frozen pineapple
  • Green layer: 2 frozen bananas, 1 handful of spinach, 1 cup frozen pineapple
  • Blue layer: 2 frozen bananas, 1 cup frozen pineapple, small amount of blue food coloring
  • Purple layer: 1 frozen banana, 1 cup frozen mixed berries
  • Magenta layer: 1 frozen banana, ½ cup sliced canned beets 
  • 1 cup frozen strawberries or raspberries 

Instructions: Blend each smoothie as a layer. Then, scoop the mixtures into the molds in the correct order. Add the sticks once the molds are filled and freeze the popsicles overnight.

Watermelon Popsicles

Photo courtesy of Eat Simple Food

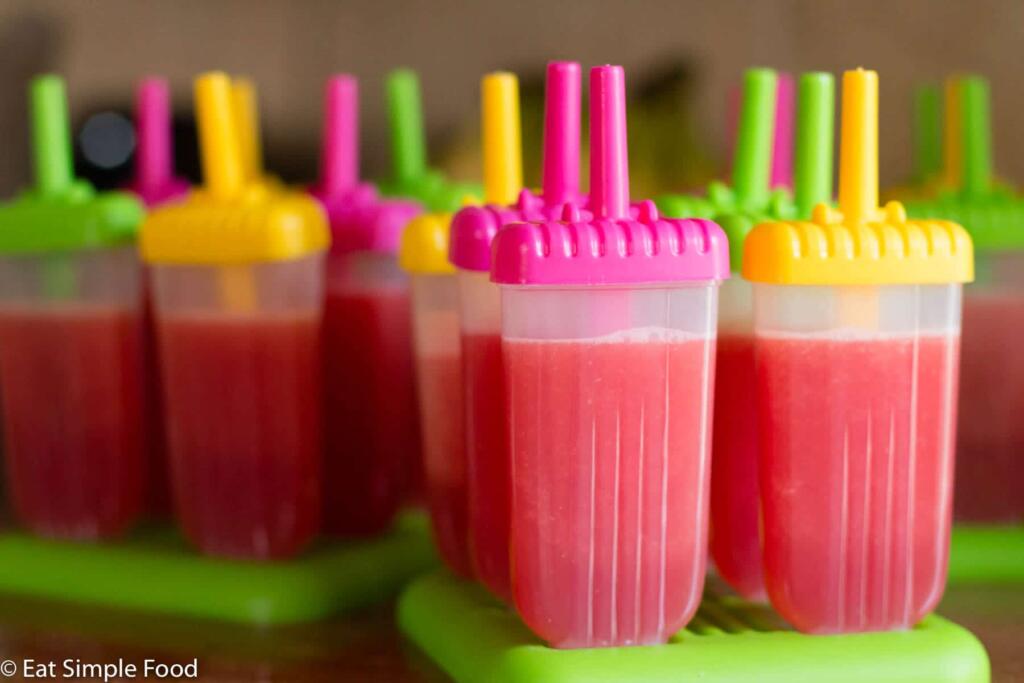
There’s no fruit that screams “summertime” quite like watermelon. While this tasty fruit is delicious in its own right, watermelon in popsicle form is bound to be your new seasonal craving. This popsicle recipe is super easy and only takes about 20 minutes to make. 

Ingredients: 

  • 1 small watermelon (seedless) 

Instructions: Cut off the watermelon rind and toss it. Cut the watermelon into cubes, then place in the blender. Once it’s smooth, pour it into popsicle molds, leaving some space at the top for sticks. Freeze for at least 4 hours!

Best Materials for Creating a Backyard Walkway

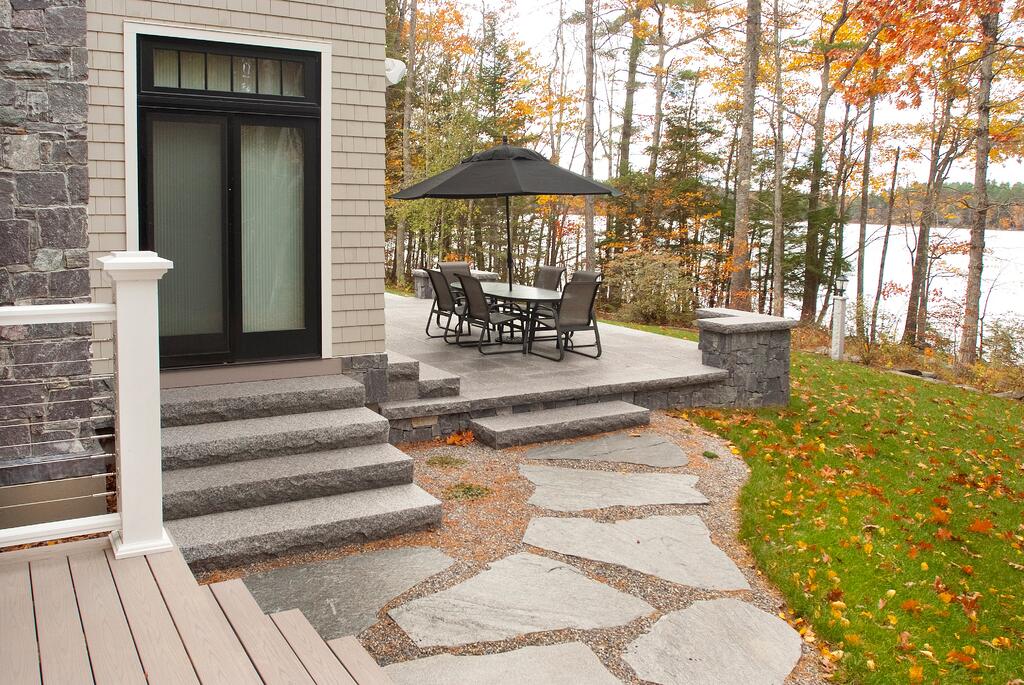
Photo courtesy of Swenson Granite Works

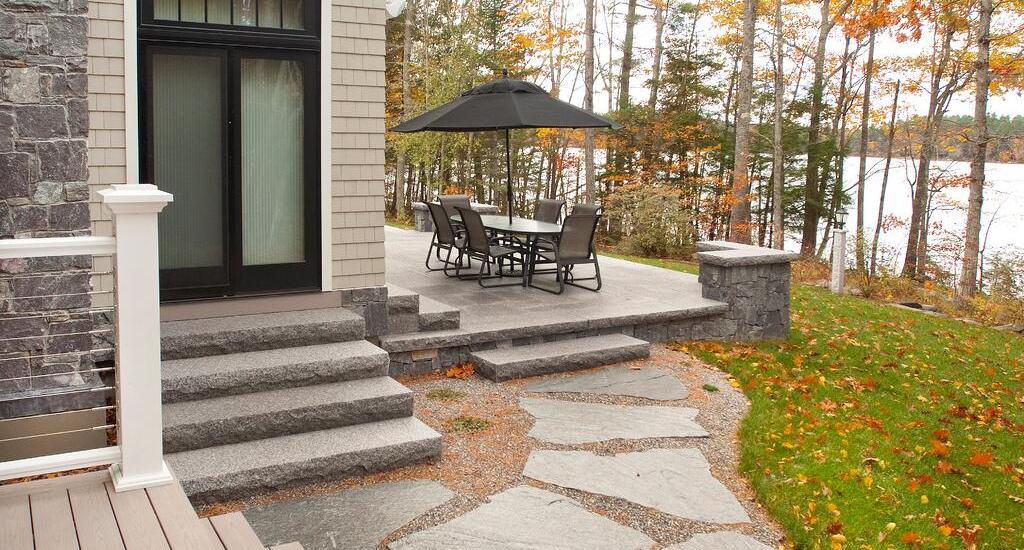
When designing your lake house’s backyard, low-maintenance landscaping strategies can help you cut down on manual labor and reduce water waste. One often overlooked tip for a stress-free backyard is incorporating hardscapes. In particular, walkways are an excellent choice. Not only do they minimize your grass maintenance workload, but they’re also beautiful. The contrast between grass and a material like brick or stone adds an element of visual interest to your lakeside curb. If you’re thinking about installing a backyard walkway into your landscape, check out these ideas for inspiration.

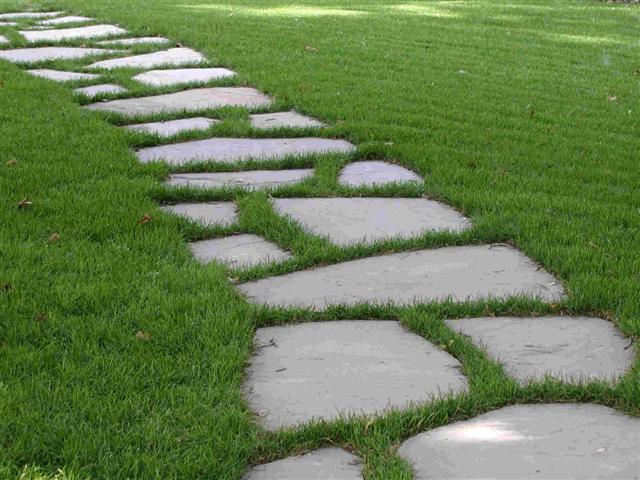
Stepping Stones

Photo courtesy of How to Build a House Blog

For anyone who prefers DIY over hiring a professional, this backyard walkway idea is for you. To make a stone walkway at your lake house, all you need is several large stones. Just arrange them over grass to form a simple yet beautiful pathway through your backyard. To create a more interesting, rustic look, pick stones of all different shapes. The DIY Network walks you through this easy process with their tutorial.

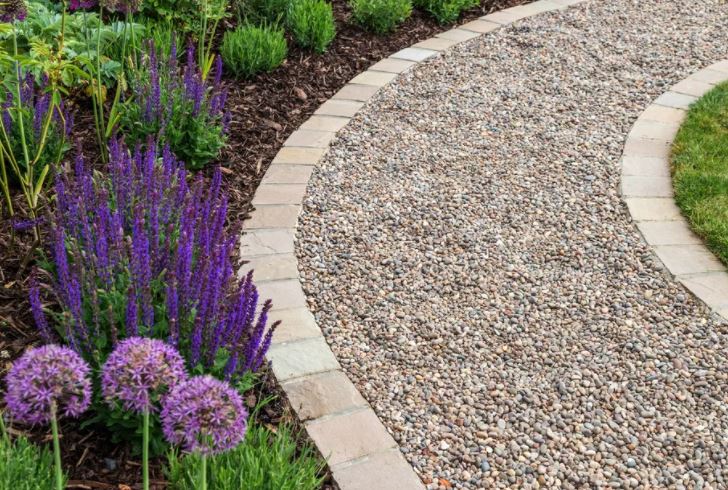
Gravel

Photo courtesy of GAP via This Old House

Gravel is an easy, inexpensive way to create a stunning walkway. These small stones come in all different colors and sizes so that you can customize the path to your liking. You can even add stone material alongside the path to evoke a more structured look. To ensure the gravel doesn’t wash away in bad weather, The Gardener of Good and Evil has instructions on creating a foolproof DIY gravel walkway.

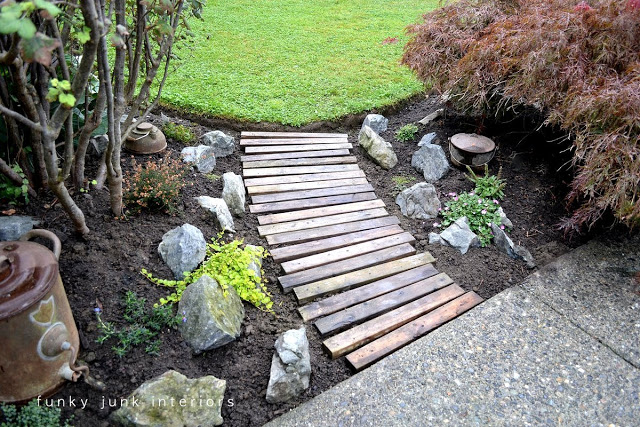
Pallet Wood

Photo courtesy of Funky Junk Interiors

At a lake house, a rustic pathway through your lakeside garden is certainly fitting. If you want to lean into the natural look, use pallet wood to create your backyard walkway. Plus, if you incorporate space between the wide wooden boards, it allows room for plants to grow. Laura from Garden Answer demonstrates a budget-friendly way to create one of these charming pathways. For this DIY project, all you need are wooden planks and some basic power tools.

Brick

Photo courtesy of Family Handyman

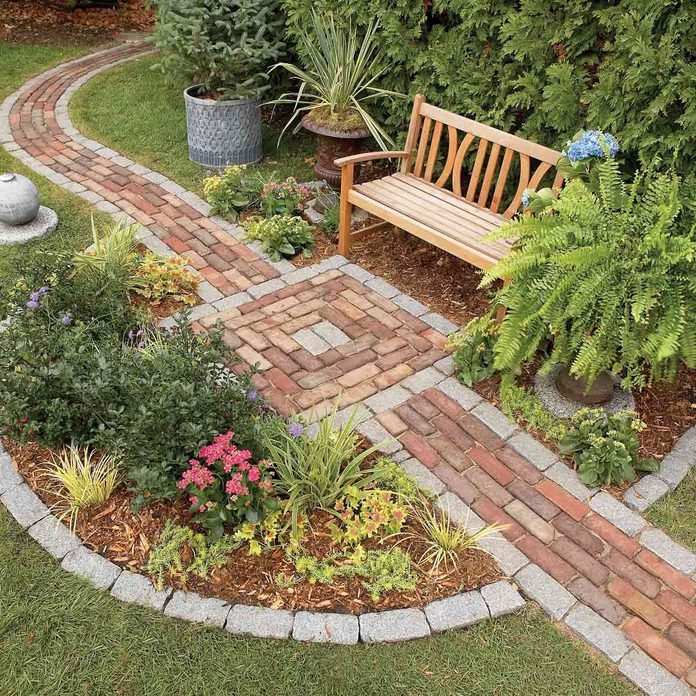
A brick walkway is perfect if you prefer a more upscale, polished look. This design also allows for customization, so you can arrange these bricks however you’d like. While a herringbone pattern is classic, you could also organize these stones in many patterns, alternating between vertical and horizontal to create visual interest. As brick pathways are a bit harder to DIY, installing this yourself is possible, as demonstrated in this HGTV tutorial. Just be sure to take the time to level out the ground first.

Mulch

Photo courtesy of Bob Vila

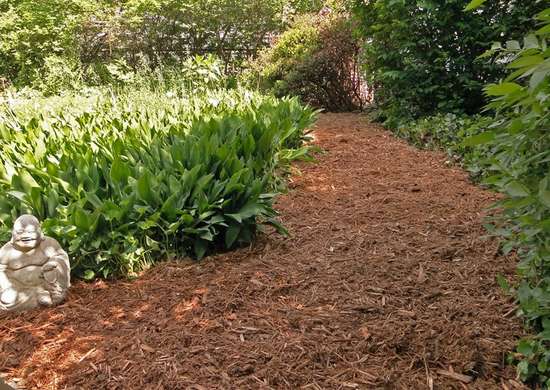
With a backyard walkway made from mulch, you’ll immediately make your guests feel like they’re entering a botanical wonderland. DIY friendly, this material evokes a strong sense of natural beauty. It’s a perfect combination of rugged and sophisticated. Mulch is also easy to combine with other materials such as stone. The blog Pretty Handy Girl details instructions for creating mulch and stone walkway combinations. 

Mosaic

Photo courtesy of Fine Gardening

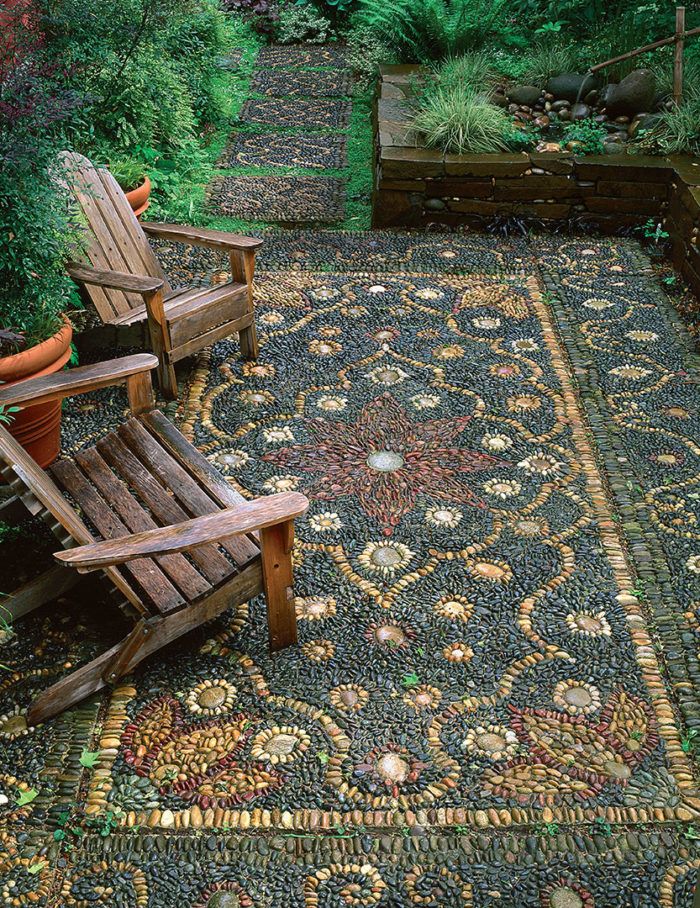
Want to invoke the same aesthetic as the Ancient Romans? Installing a mosaic walkway is a great way to impress all your guests. It immediately gives off an elegant, stately essence. Due to its complexity, many lake homeowners would have a mosaic walkway installed by a professional. However, if you’re interested in the DIY route, follow these instructions from This Old House. By creating a mosaic pathway yourself, you can incorporate your own creative designs into the mix.

Concrete

Photo courtesy of Home Talk via Pinterest

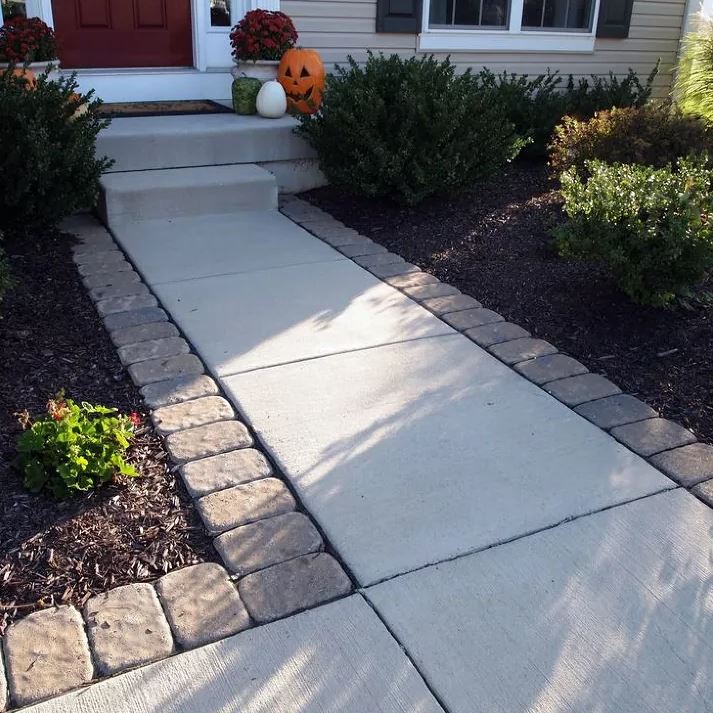
Concrete is one of the most popular choices because of its versatility. It comes in a variety of colors, so you can stick to a beige industrial look or opt for a darker gray tone for a faux-stone aesthetic. Concrete also gives off a striking impression when contrasted with grass, as its smooth surface stands out against textured greenery. If you want to use concrete for your backyard walkway, The Family Handyman has tips on how to DIY. 

No matter what material you choose, we wish you the best of luck with your backyard walkway DIY project!

Your Guide to DIY Sunscreen

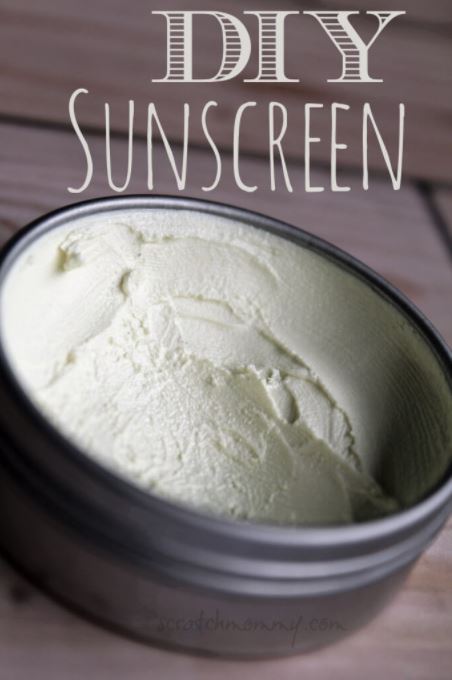
Photo courtesy of ScratchMommy.com

At the lake during the summer, you never want to venture outside without sunscreen. We’ve all experienced the consequences of failing to do so. A painful burn, sometimes one that’s uneven due to haphazard sunscreen application, is never fun. For many, the consequences are even more severe. According to the American Academy of Dermatology, one in five Americans will develop skin cancer in their lifetime. So, to avoid that painful sting and a trip to the pharmacy for aloe vera, it’s best to apply sunscreen every time and do it right. This includes knowing the rules of SPF, how much to use, and when.

Now that we’ve established the importance of sunscreen, the type of sunscreen you wear is up to you. There are pros and cons to each. Mineral sunscreen is topical, so it washes off quickly, but you avoid the possibility of chemicals in the bloodstream. By contrast, chemical sunscreen gets absorbed into your skin, and while it lasts longer, it’s less natural. However, there’s also a third option — DIY sunscreen. Whether you’re looking to save money, avoid the store, or explore natural sunscreen ingredients, DIY sunscreen can be a great option. But before applying your homemade concoction on a sunny day, it’s essential to know the basics. Today, we’ll be going over the risks, benefits, and must-have ingredients for creating your own sun protection.

How Will My Sunscreen Work?

Image courtesy of Prevention.com

First and foremost, DIY sunscreen is not simply a craft project to take lightly. A lot is at stake when it comes to skincare, so it’s important that you create an effective sunscreen. It must have a Sun Protection Factor (SPF) of at least 30, and it must cover both UVA and UVB rays (known as “broad spectrum” sunscreen). An understanding of sunscreen mechanisms is also essential. Basically, they work by scattering or absorbing these harmful UV rays so they don’t penetrate and burn your skin. The sunscreen you create will need to do this effectively.

What Ingredients Should I Use?

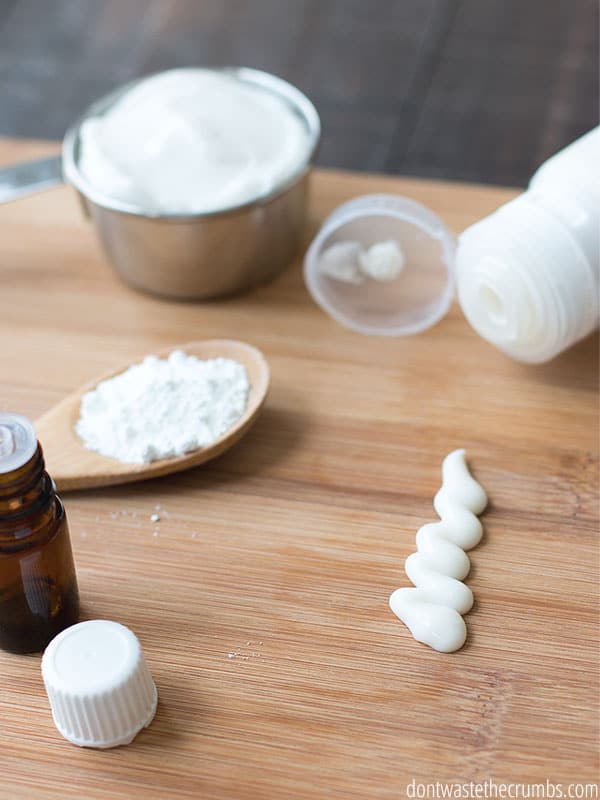
Photo courtesy of dontwastecrumbs.com

When creating your own sunscreen, you need to use ingredients powerful enough to block this broad spectrum of UV rays. So, how do brand sunscreens do this? For sunscreens to be approved by the FDA, they need to include titanium oxide or zinc oxide. Beyond this, they may contain various additional ingredients — some to endorse and some to avoid. For example, steer clear of sunscreen that includes insect repellants or strong fragrances. When making your own DIY sunscreen, include one of these two FDA-approved chemicals and skip on anything you don’t want on your skin.

What Recipes Can I Follow?

Photo courtesy of goddessgarden.com

If you google “DIY sunscreen” online, you’ll find a variety of different mixtures, mainly from bloggers, detailing their creations. However, it’s hard to know which ones will actually provide decent sun protection. An online magazine, Healthline, compiled a list of tried-and-true recipes that you can create at your lake house. Straight from their expertise, check it out below: 

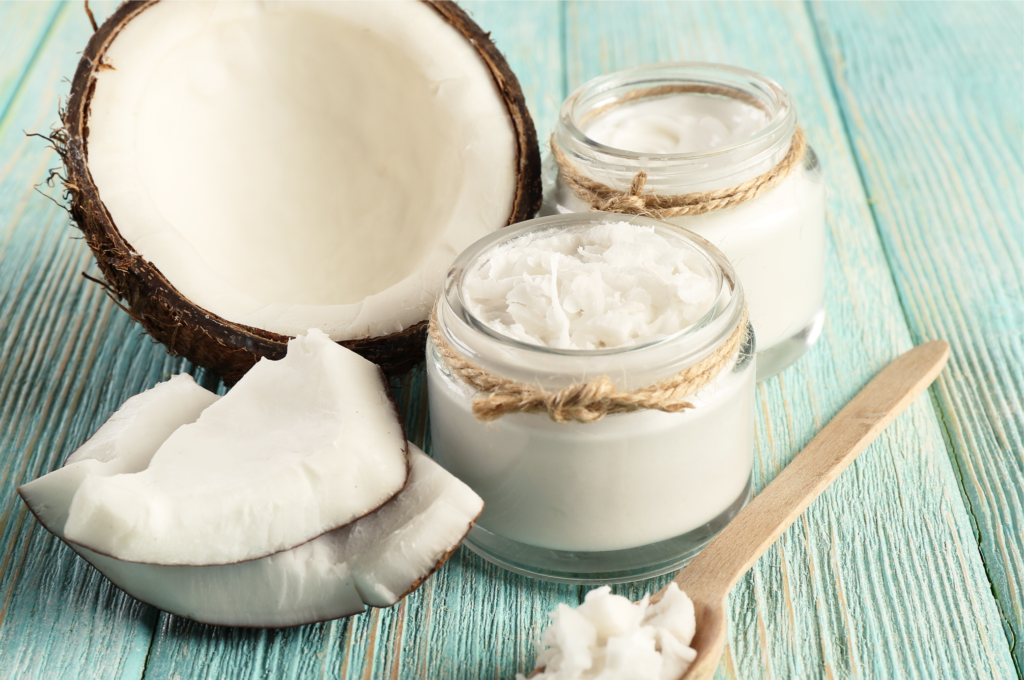
  • ¼ cup coconut oil with SPF 7 
  • 2 or more tbsp. powdered zinc oxide 
  • ¼ cup pure aloe vera gel that is 50% or higher 
  • 25 drops of walnut extract oil 
  • 1 cup of shea butter 

Although aloe vera is typically conceptualized as a sunburn treatment, this ingredient helps prevent sunburns as well. Additionally, the walnut extract adds an organic fragrance while the shea butter creates a smooth texture. Keep in mind that it’s not waterproof (most DIY sunscreens will not be waterproof), so you’ll need to re-apply frequently. To create a spray version, just take out the shea butter. If you need sunscreen for oily skin, substitute coconut oil with jojoba oil or sweet almond oil — these two ingredients will not cause as much oil buildup on the skin.

For other DIY sunscreen recipes, check out Don’t Waste the CrumbsWellness MamaPronounce Skin Care, and many more. We wish you the best with your recipe, and stay safe out there in the sun!

An Introduction to Vertical Gardening

Photo courtesy of Home World Design

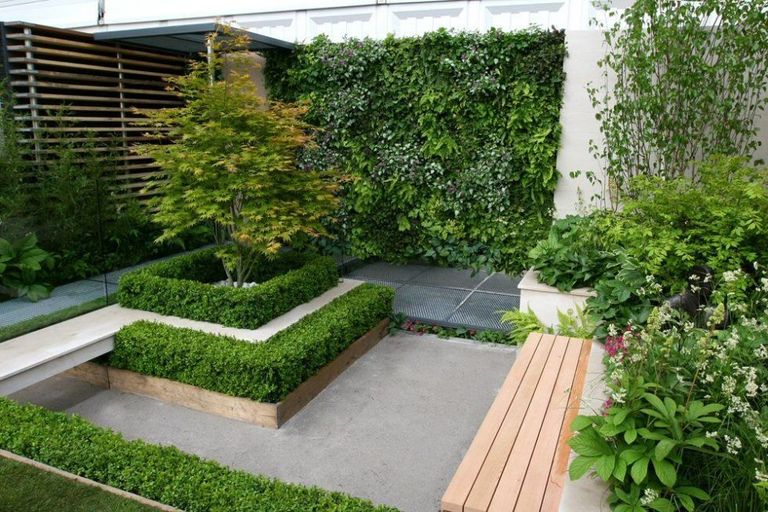
On the Lake Homes Realty blog, we’ve covered a lot of landscaping topics. By now, you’re probably well versed in cultivating gardens that adhere to your USDA zone, as well as new low-irrigation techniques like xeriscaping. But have you heard of the latest trend — vertical gardening? Especially perfect for those with smaller backyards, vertical gardening makes the most use of the space you have. Think of it as the landscaping equivalent of New York City’s architectural strategy — when there’s limited space, build upwards with skyscrapers! Today, we’re diving into the basics of the vertical gardening trend and how you can implement it at your lake house.

What is Vertical Gardening?

Photo courtesy of @lenaivanovaphoto via Twenty20

In the broadest sense, vertical gardening is essentially vegetation growing on a non-horizontal surface such as a wall, trellis, or fence. Although it’s certainly a hot new trend, vertical gardening has been around since the beginning of recorded history. The history of vertical gardening begins in 3000 BCE with grapevines in the Mediterranean area. Whether for growing food or decorating homes, these vines were known for climbing up walls and trellises. Today, nearly any non-horizontal surface is perfect for growing vegetables, adding beautiful greenery to your landscape, or indoor herb gardening.

Why is Vertical Gardening so Popular?

Photo courtesy of House Beautiful Magazine

One of the most logistical benefits of vertical gardening is that it doesn’t take up too much space. If your backyard is small, or you’re living in a more urban lake area, you may need to conserve space on your property. The limits are your own property with horizontal gardening, but with vertical gardening, the sky’s the limit! From an environmental perspective, they also reduce your carbon footprint — a win-win for both you and the environment. Plus, your plants are more likely to thrive with added air circulation than on the moist ground. 

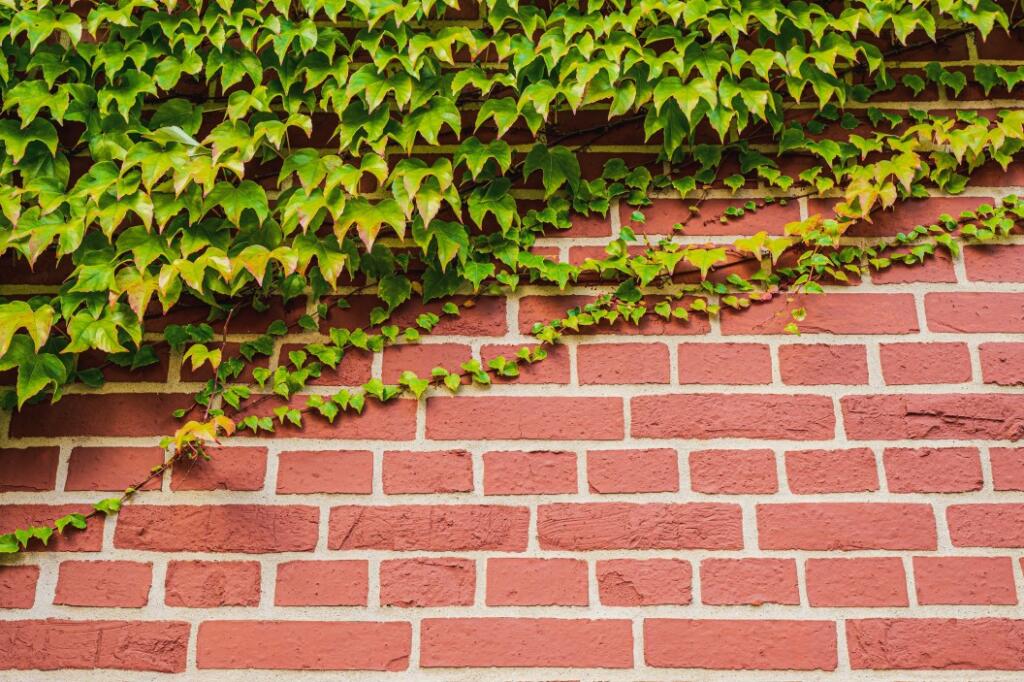
There are also aesthetic benefits to vertical gardening. A wall of blooming greenery adds dimension to your backyard. In the same way that wall art rounds out an interior design, vertical gardening draws the eye upward and offers a holistic look. Plus, there’s no better way to disguise an unattractive wall than with a whole lot of ivy.

What Makes It Perfect for Lake Houses?

Photo courtesy of Catriona Tudor Erler via Smith Mountain Laker Magazine

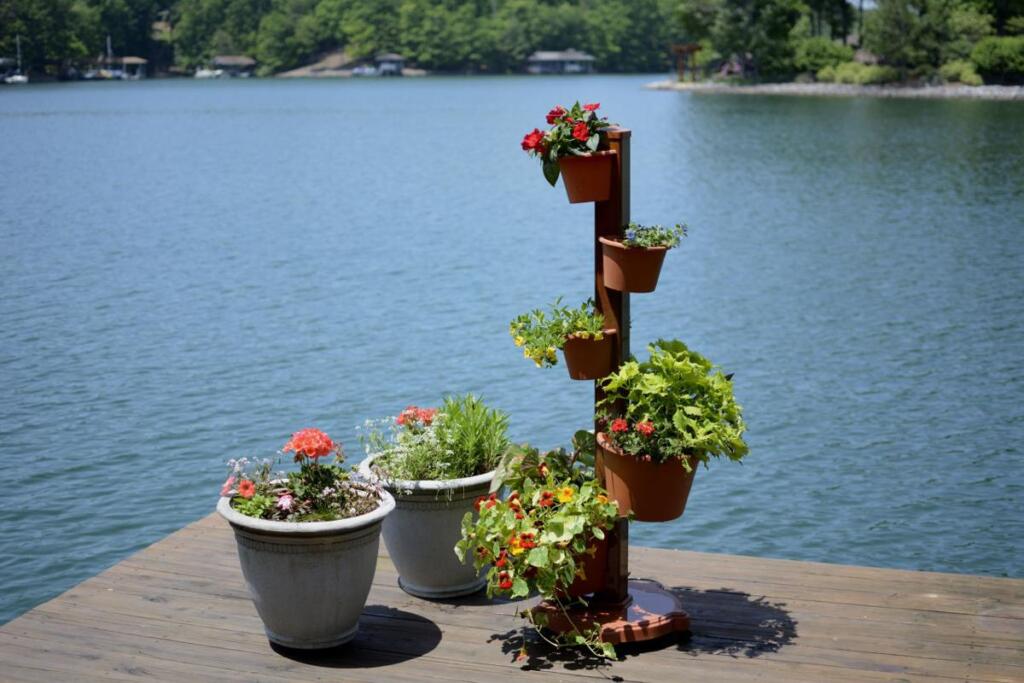
Have you ever wanted to incorporate greenery onto your boat dock but didn’t have enough room? Enter vertical gardening. For smaller spaces like boat docks, vertical gardening is the perfect solution. The same goes for your screened-in porch overlooking the lake. Further, vertical gardening is simply another way of showing off your biophilic design. This design trend embraces the natural world and also reflects the values of many lake homeowners who spend a lot of time appreciating nature.

How Can You Incorporate Vertical Gardening?

Photo courtesy of Pinterest

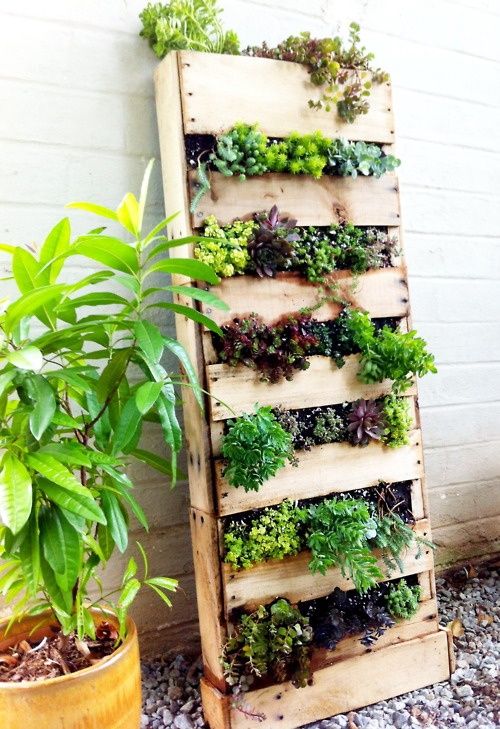
There are tons of different ways to incorporate vertical gardens into your lake home. If you’re looking to get creative, try a DIY project. For example, you can simply re-pot your house plants into wooden crates and stack them on top of each other to create a farm-chic vertical garden. Less mainstream but delightfully creative strategies include succulent frames and monogrammed planters. If you’re not so crafty, look for an existing vertical surface to use. Perhaps you’re not so crazy about one wall of your lake house. Or maybe the fence dividing your home from the neighbor’s could use a makeover. Think outside the box with these vertical surfaces. We bet there’s a way to incorporate vertical gardening.

Whether you’re a gardening newbie or you have a green thumb, we hope you find some fun ways to use vertical gardening at your lake house!

DIY Dried-Flower Crafts

Photo courtesy of Design Sponge

On the Lake Homes Realty blog, one of our most popular DIY posts is about brightening your lake home with dried flowers. Repurposing withered blooms can spruce up your home in a simple yet sophisticated way while adding a touch of biophilic design. Although hanging dried flowers create an elegant look (it’s incredible what you can do with a little twine and hairspray), it isn’t the only option for your lake home. This week, we’re thinking outside the box. There are many ways to incorporate dried flowers into your crafting projects, including decor, utilities, and accessories. From wall art to coasters, you can’t go wrong with these DIY dried-flower crafts.

Pressed-Flower Monograms

Photo courtesy of DIYS.com

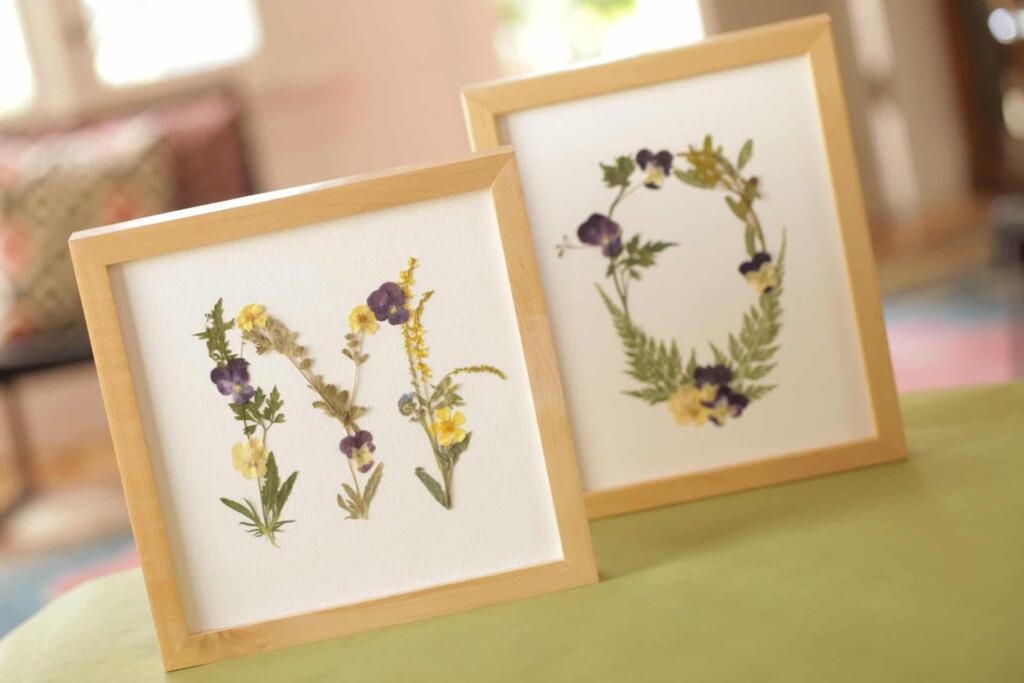
Once flowers begin to dry, pressing them is a great idea to preserve the natural colors. This involves using a book or another heavy object to push the remaining moisture out of flowers so the flat pieces can be used to create a design. These framed monograms made from delicate dried flowers add an element of creativity to your lake home. Plus, they’re easy to DIY. Check out this video for the instructions.

Dried-Flower Terrarium

Photo courtesy of The Smart Local

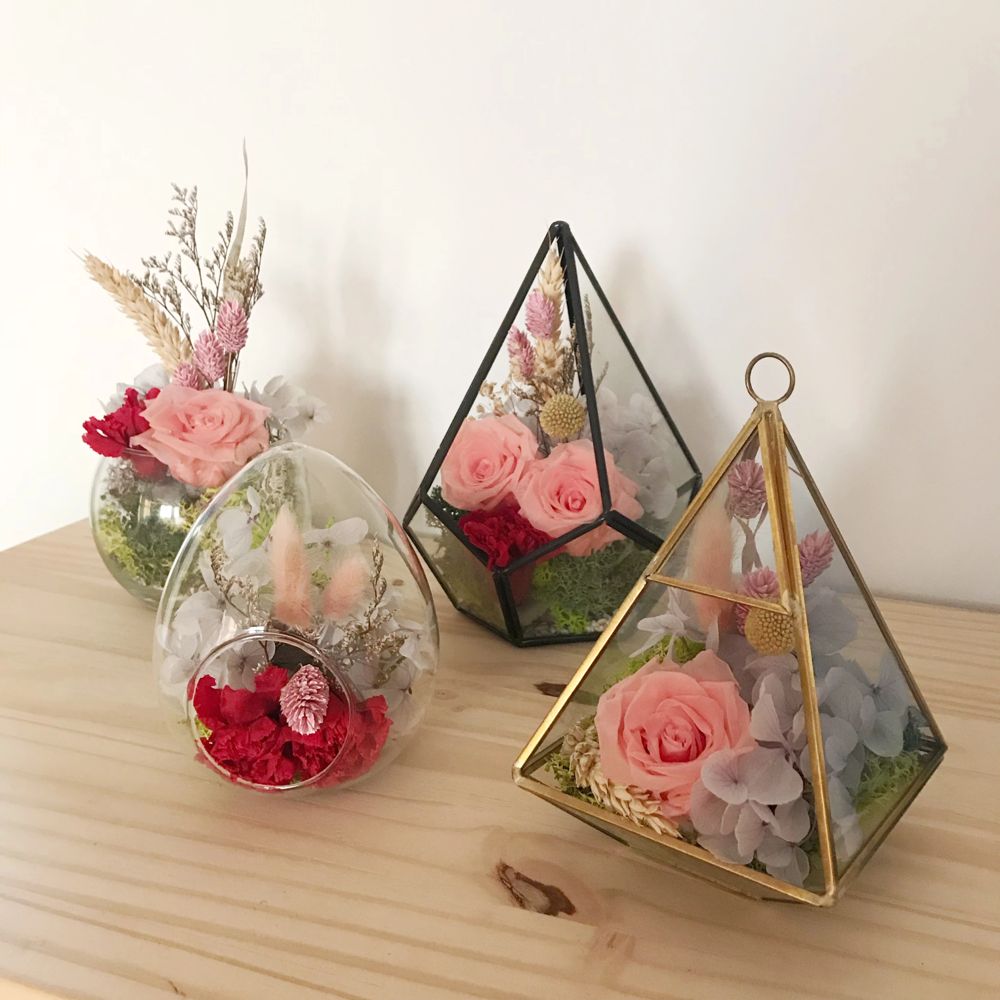
Need a new centerpiece for your table? Or a flowery decoration for your mantle? This simple, DIY dried-flower craft is a perfect addition to your lake home. The geometric glass container with a stylish brushed metal accent will add a contemporary feel to your living room. All you need are dried flowers and sand to complete the look. At Afloral.com, you can get the full tutorial.

Dried-Flower Sachets

Photo courtesy of DIYS.com

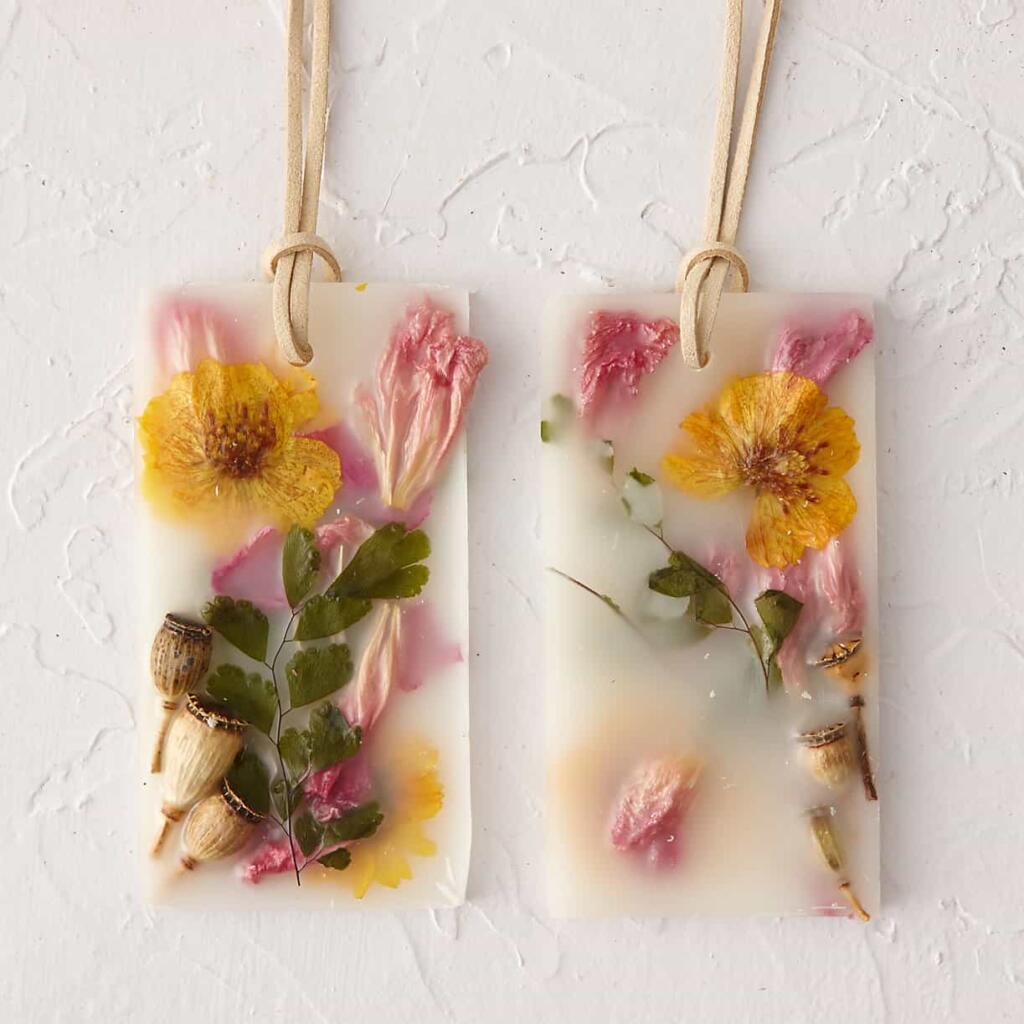
While driving to your remote lake house, you’re spending plenty of time in the car. And nothing is worse than an unpleasant smell on a long road trip. Rather than buying an air freshener from the gas station, try using some leftover dried flowers to create these beautifully scented sachets. You’ll need a few other materials, such as wax molds, but this elegant end product is well worth the effort. Hearth & Vine’s blog features more detailed instructions on these DIY dried-flower sachets.

Dried-Flower Bath Salts

Photo courtesy of Almost Makes Perfect

Looking to repurpose those dried roses you’ve been saving? Mix in some Epsom salts, sea salt, baking soda, and essential oils for a decadent bath-salt mixture. Using this tutorial from Almost Makes Perfect, you’ll be able to make dozens of batches at once. Besides treating yourself to a bubble bath at the lake, these bath salts also make excellent gifts!

Floral Phone Case

Photo courtesy of LotusWei

For this craft, all you need is a clear phone case. You can even coordinate the color of your phone to compliment the flowers you choose. To create this easy DIY phone case, as outlined by LouisWei, just take a few dried flowers and press them on the inside of a clear phone case. Then, snap it onto your phone and — voila! For a more involved version, check out these instructions that incorporate a clear resin to hold the dried flowers in place.

Dried-Flower Coasters

Photo courtesy of Frankie Magazine

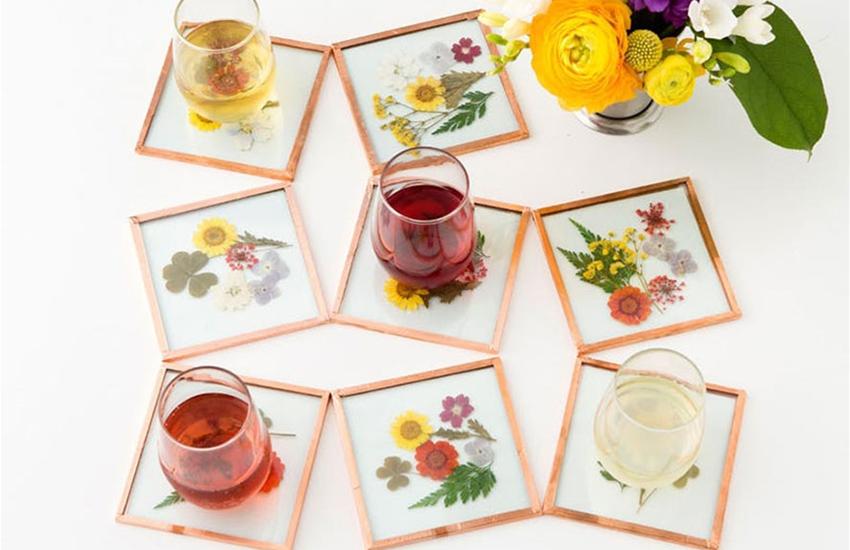
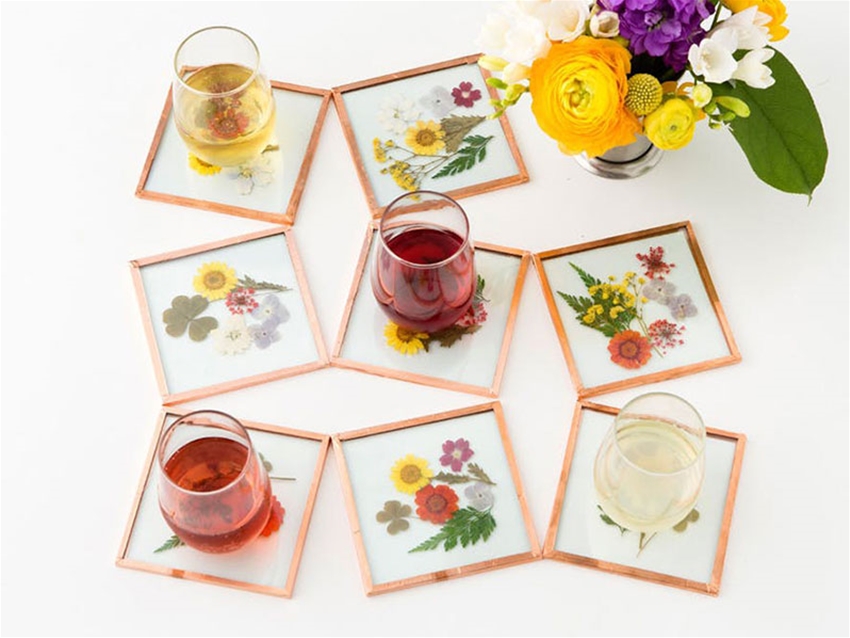
When dining at your lake house, these coasters are the perfect accessory to showcase your connection to nature. Plus, the brushed metal and glass look is fresh and stylish. Ideal for a friend who loves the lake, they make an easy and thoughtful gift. You can even pick their favorite flowers to use in your coaster creation.

Pressed-Flower Lanterns

Photo courtesy of A Practical Wedding

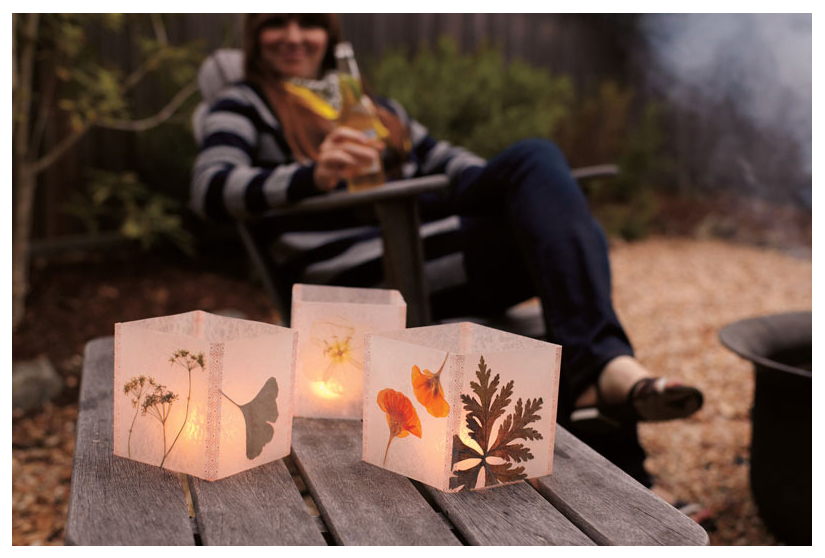
During the pandemic, we’ve become experts at hosting guests outdoors. When gathering friends around a fire pit, this collection of DIY dried-flower lanterns evokes an elegant ambiance. Especially around dusk, this soft lighting will bring out a sense of warmth at your lake house. To create them, you need pressed flowers and greenery, wax paper, a cutting board, and an iron. These instructions from A Practical Wedding will help guide you! 
We hope these crafts inspire you to put those dried flowers to use this spring!
Best Indoor Herb Garden Sets

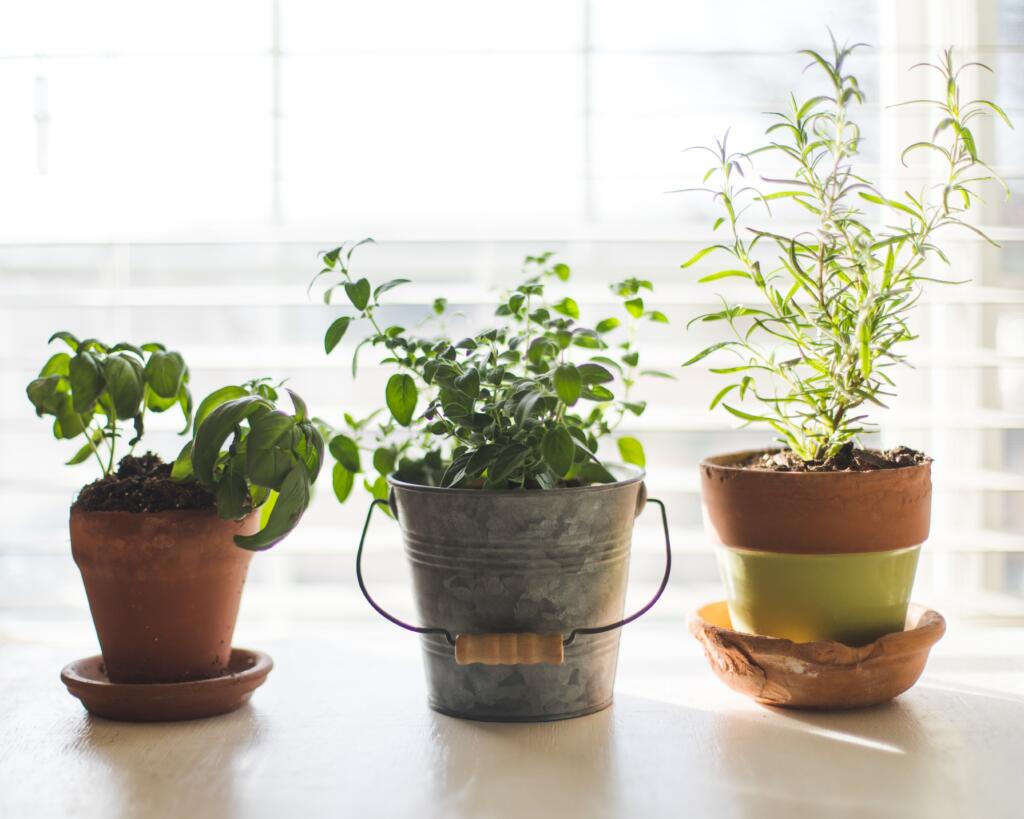
On the Lake Homes Realty blog, we’ve written a lot about the joys of gardening and cooking, and the place where these two popular lake house hobbies intersect is indoor herb gardening. There’s a ton of perks to this easy hobby. Not only are indoor herb kits organic and fresh, but they’re also a great money saver. Especially during the winter season, they’re an excellent placeholder for the outdoor gardening you’re saving for spring. Check out some of the best indoor herb garden sets for the current season.

If You’re On the Go

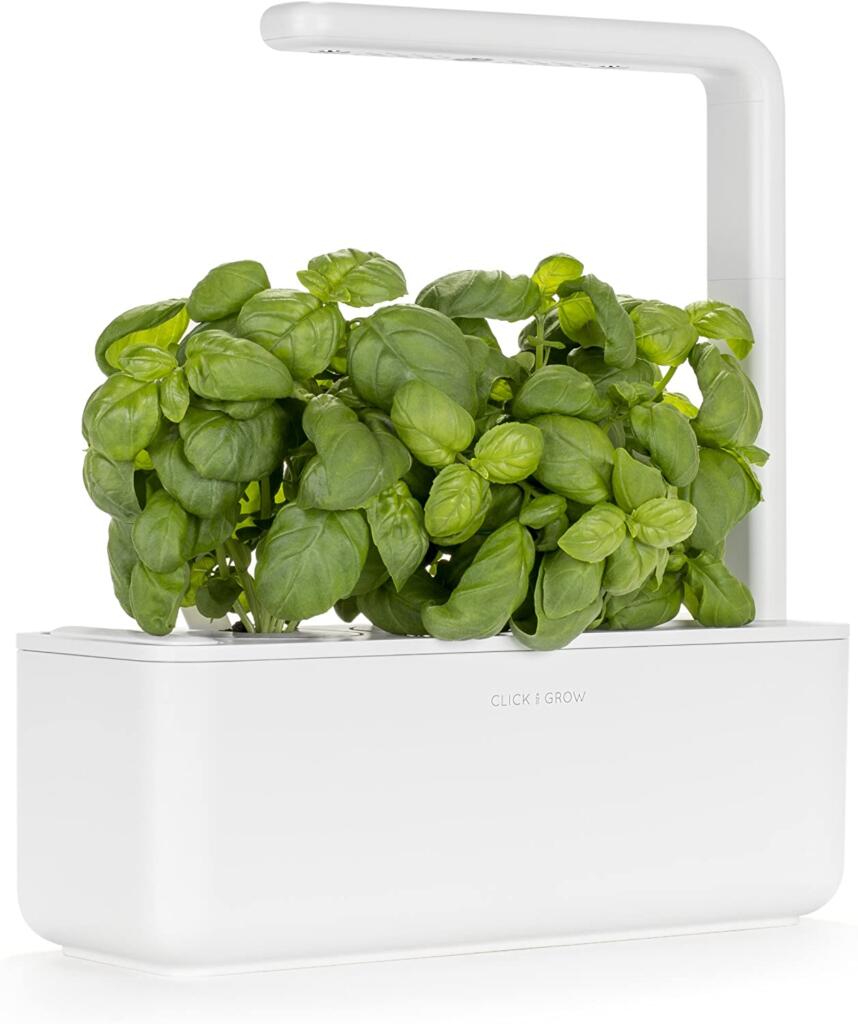
Click and Grow Smart Garden 3 – Amazon.com

The Click and Grow Smart Garden was named one of the best self-tending indoor herb garden sets by The Spruce magazine. With energy-efficient LED lights to grow your plant of choice, this garden is easy to set up. Just drop in the plant pods, fill the water reservoir, and plug in the kit. Besides its ease of use, another perk of this Smart Garden is its versatility. You can grow anything and everything from strawberries to basil to chili peppers. The self-watering tank requires little to no effort, so you can spend more time enjoying the lake and less time watering your herbs. 

If Your Kids Want to Garden

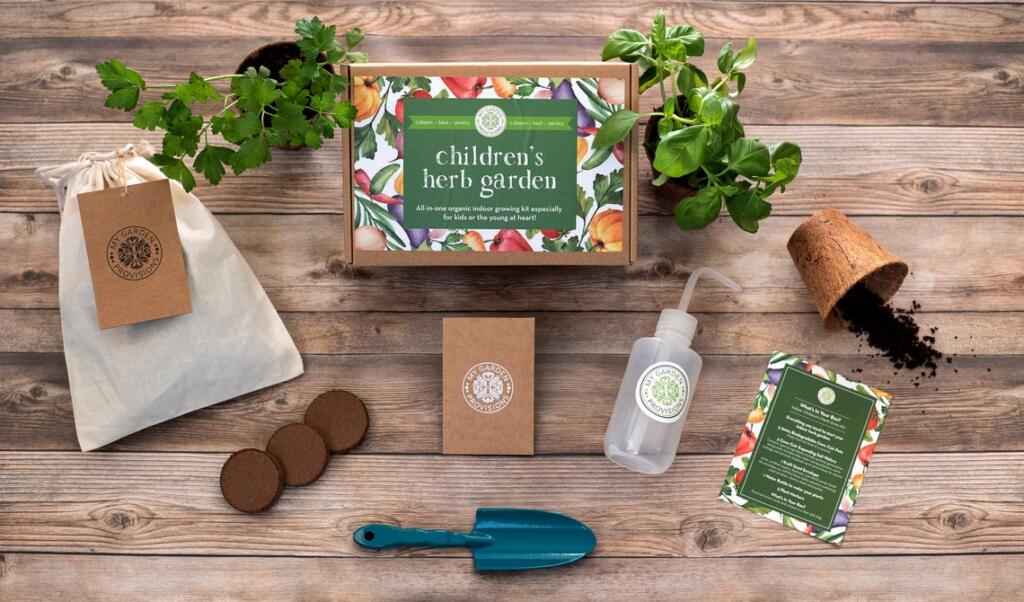
Kid’s Indoor Herb Garden Grow Kit – Etsy

If you’re an avid gardener and want to include your kids in the process, this Kids Indoor Herb Garden Grow Kit from Etsy is perfect. This kid-friendly kit comes with herb seeds, soil, biodegradable pots, and a small shovel. Depending on what dishes your kids enjoy, you can choose to grow basil, cilantro, or parsley as garnishes. It functions as a dual opportunity to teach kids how to grow herbs and incorporate them into cooking projects.

If You Have a Small Kitchen

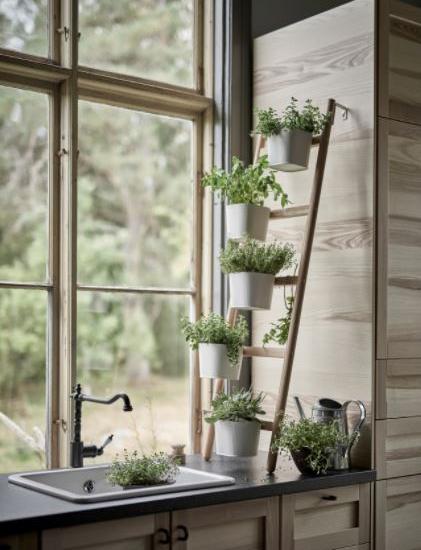
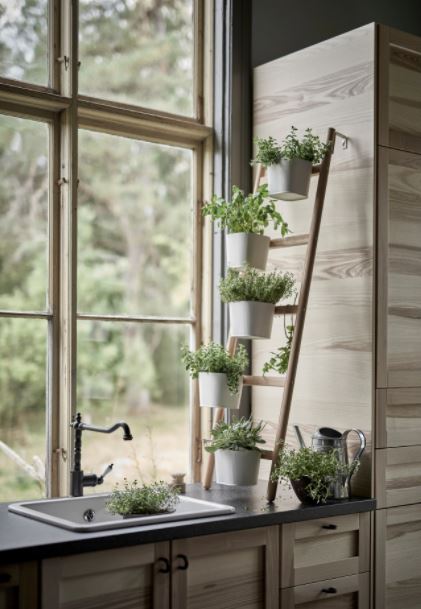
This Vertical Plant Stand is not one of your typical indoor herb garden sets. The product doesn’t come with seeds or soil. Instead, it’s a structure from which to start building your garden. This plant ladder comes with five pots, which allows you to grow several herbs together vertically. This setup is perfect if you have a small kitchen at your lake house. If you only want to produce a few plants, you could store pens, notebooks, or other supplies in the remaining holders. Both trendy and versatile, this plant stand is an excellent choice for your kitchen. 

If You’re on a Budget

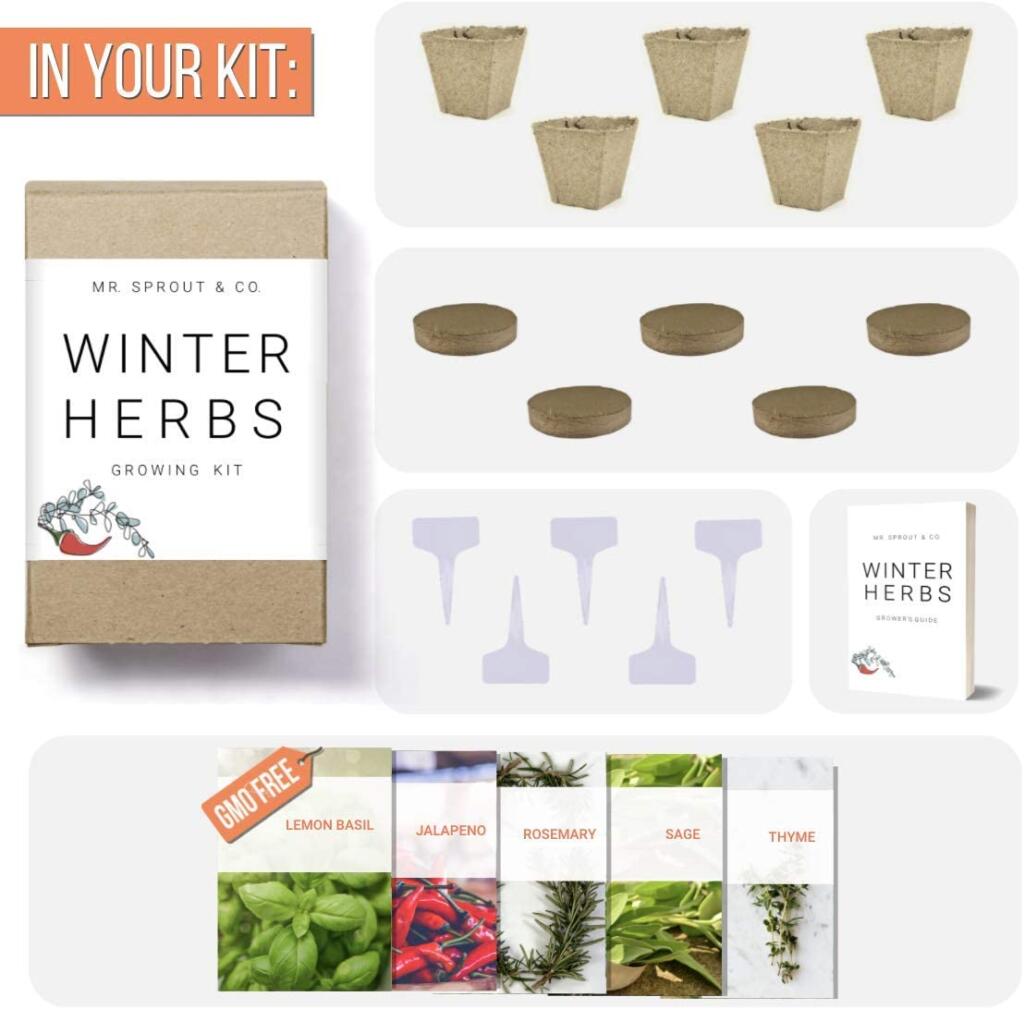
Winter Indoor Garden Kit by Mr. Sprout – Amazon.com

This Winter Indoor Garden Kit is perfect for starting your own indoor herb gardening. Just $25, this set has everything you need to get started. In addition to peat pots, plant tags, and soil pellets, it comes with a grower’s guide manual that provides comprehensive instructions for your garden. Plus, it’s specified for the winter season. With wintertime herbs such as lemon basil, rosemary, thyme, sage, and jalapeno, you won’t eat a flavorless meal for months. 


If You Love Spicy Foods

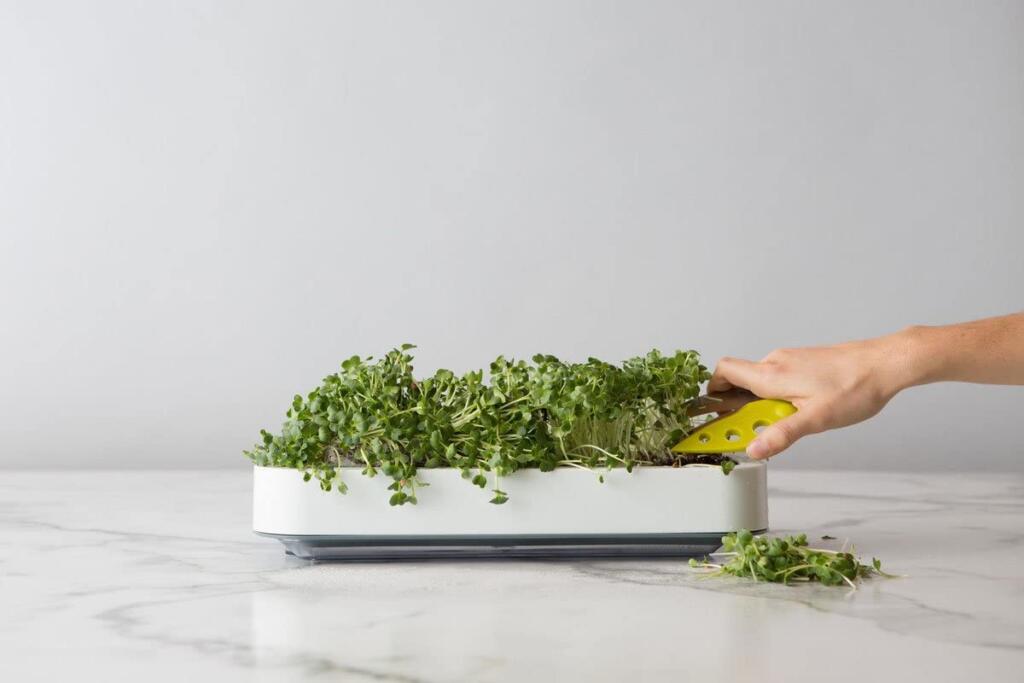
Chef’n Microgreens Grower – Amazon.com

Calling all spicy food lovers! While herbs like rosemary will add a refreshing taste to your palette, some of us like foods with a little more kick. If this is you, you’ll want to check out herb garden sets with microgreens. This Chef’n Microgreens Grower will fit on a windowsill or countertop at your lake house and will allow you to grow fresh microgreens very quickly. Unlike herb sets, you have the option to buy the Spicy Mixed Microgreens pack, which includes broccoli, kale, kohlrabi, arugula, red acre cabbage, and southern giant mustard greens to add spice to your food. These miniature versions will also bloom faster than full-sized plants — a win-win for those who want delicious home-grown, healthy greens within a short amount of time.

5 DIY Lake House Signs Project

Photo courtesy of Pinterest.

When it comes to decor for your lake house, there’s no shortage of DIY projects. Whether it’s a homemade fire pitchalkboard paint, or driftwood decor, it’s empowering to take interior design into your own hands. One classic staple found in many lake homes is the lake sign. These cute “go jump in the lake” or “rules of the lake” pieces are a fun way to customize your home with lake-specific decor. But if you want a lake sign, there’s no reason to spend money on a design sold on Etsy. Plenty of bloggers have shared their secrets for creating a DIY lake house sign. Check out our top 5 favorites! 

“Go Jump in the Lake” Sign

From Uncommon Designs, this DIY lake sign has a unique vintage flair. The fire-engine red tone against cursive letters resembles a classic cola logo, evoking a familiar feel. The distressed paint especially stands out against a textured wall.  

Supplies: 

  • One canvas 
  • Chalk paint 
  • Vinyl lettering cut or pre-made vinyl stickers 
  • Acrylic craft paint 
  • 150 grit sandpaper 
  • Stain and water 

InstructionsPurchase a blank canvas or use an existing art piece that you don’t mind painting over. Cover the canvas in a base coat of chalk paint (this blogger used Annie Sloan Chalk Paint in Country Grey). Using the vinyl lettering cuts or stickers, place the letters spelling “Go Jump in the Lake” onto the canvas. Paint over the vinyl letters with a simple acrylic red craft paint and pull the letters off once they’re dry. For the vintage look, rough up the canvas with sandpaper and wipe the canvas with the 1:1 strain and water mixture. 

Rustic Lake House Sign

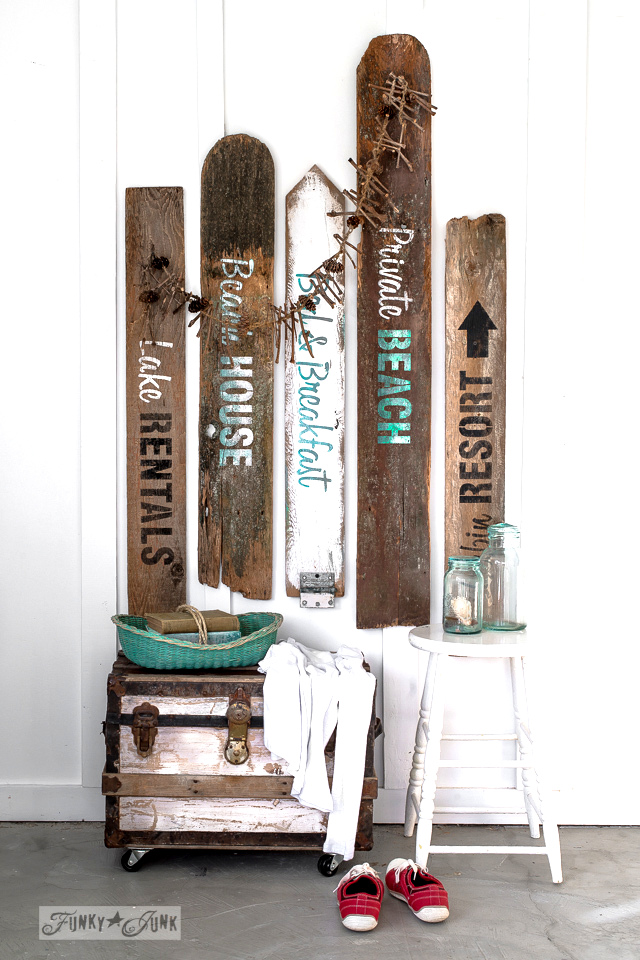
If your lake house decor has a rustic cabin vibe, this sign is perfect. From Funky Junk Interiors, Canadian blogger Donna uses old items to decorate her home. She’s all about repurposing what others may call “junk,” and this DIY lake sign is no exception. 

Supplies: 

  • Wooden boards 
  • Stencils for a word or phrase of your choosing 
  • Paint (three colors)
  • Tape 

Instructions: Lay any number of wooden boards out. Then, take your chosen stencils and tape them to the wooden boards for security. Using a paint color of your choice (this blogger used a combination of turquoise, white and black fusion mineral paints), tap each letter with a dried brush. Then remove the stencils! 

Lake House Driftwood Wreath

If you own a Cricut Joy machinethis DIY lake sign is the perfect excuse to dust it off. Without this appliance that prints adorable labels, you can still create the driftwood wreath to add a nautical flair to your front door. Tanya from Dans Le Lakehouse blogs about several other DIY projects you can check out, too!

Supplies: 

  • Cricut Joy 
  • Cricut Joy Smart Vinyl 
  • Other Cricut supplies (Weeder Tool, scraper tool, transfer tape, design space)  
  • Driftwood 
  • Air nailer and compressor 
  • 1” and 1.5” nails
  • Rope for hanging
  • A sheet of Lexan, plexiglass, or plywood
  • Screws and drill 

Instructions: Start by collecting small pieces of driftwood around your lake house! Once you have enough for the lake sign, set down a bucket the same circumference as your desired wreath. Create the bottom layer, then add more layers of driftwood pieces, air nailing them as you go. Then, cut a small rectangle of plexiglass and use the Cricut Joy tools to create your customized lake sign in the wreath’s center. Tie a rope at the top for hanging. 

Faux Wood Lake Sign

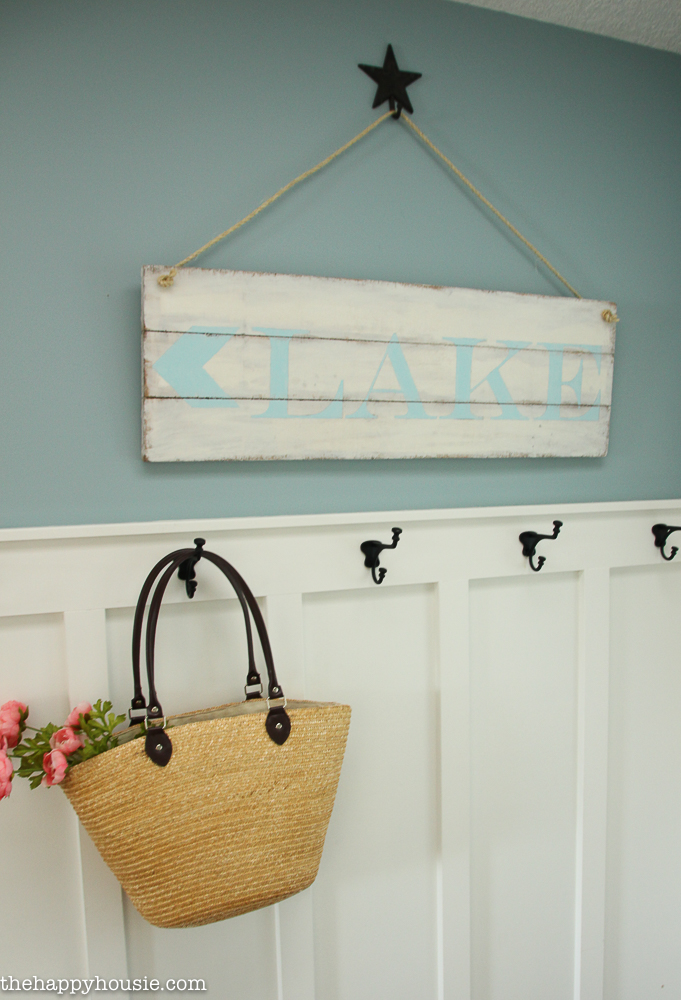
This simple DIY lake sign from The Happy Housie blog is elegant yet rustic. When Krista, the blog’s creator, noticed that most lake signs featured arrows pointing towards the road rather than the lake, she created a sign. While Krista makes her piece from faux wood, you can use either real or faux wood for yours. 

Supplies: 

  • Foam tools (foam sheet, smooth finish, foam knife, and tuck & scribe tools)
  • FloraCraft Styro Cutter Plus 
  • Putty knife 
  • High grit sandpaper 
  • Wood stain wipes 
  • Acrylic paint craft in two colors (blogger used Martha Stewart “Summer Linen” and “Summer Haze” 
  • Ruler
  • Printed lettering and arrow 
  • Carbon tracing paper 
  • Twine 

Instructions: Apply 2-3 coats Make It: Fun Crafts® Smooth Finish with a putty knife onto the foam. Allow it to dry and sand lightly with sandpaper. Measure 4” strips of foam and mark at intervals using a ruler to mimic a wood plank look. Use the “tuck and scribe” tool to smooth it out. Apply wood stain around the outside edges and faux plank edges. After it dries, apply a coat of white paint. Then, line up lettering, trace it, and fill in the lettering using the other paint shade. Hang with a rope. 

Live Love Lake Sign

You’ve probably seen plenty of ‘live, laugh, love” wall art (or even own some), but this one from My Porch Prints is more fun and a lake-specific version. If you’re looking for a simple, vintage sign that isn’t excessively colorful, this is the project for you. 

Supplies: 

  • 1×1 wooden boards (for the frame)
  • Flat pieces of wood for the sign
  • Screws, nails, or nail gun 
  • Picture hanging hardware 
  • Paint stain for the frame 
  • Acrylic craft paint for the words 
  • White latex paint for the background 
  • Paintbrushes 
  • Willow charcoal or pencil 

Instructions: Assemble the wooden frame by cutting and nailing the side pieces together. Cut the flat wood panel, but do not nail it to the frame quite yet. First, stain the frame by lightly brushing the stain across the wood. Then, use white latex paint for the panel. Using Microsoft Word or other software, print out the words “Live, Laugh, Lake” and use it as a stencil on the panel. Trace the words using a pencil or charcoal. Finally, paint the words in black using a dry brush technique. Attach the panel to the frame, and hang on your wall. 

Which DIY lake sign are you going to choose for your next project?