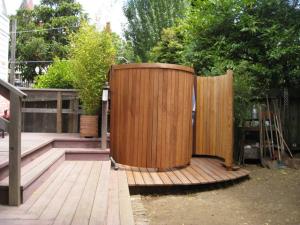
Sure, it sounds backwards to have a shower on the outside of your house, but if you live at the lake, an outdoor shower may be exactly what your lake home is missing.
Take a few minutes to check out the benefits of installing an outdoor shower to your home, and see how easy it can be to do it yourself!
Benefits of an Outdoor Shower
Convenient, mess-free changing room:

How many times have you had to walk through your home — wet and freezing — just to make it to a changing room after a day on the lake?
Not only is it a chilly trek, but the trail of water you leave behind can potentially damage your floors and cause unsuspecting lake lovers to slip and fall.
An outdoor shower provides a convenient (and warm) place to change out of your wet clothes and allows you to rinse any leftover lake grime down the drain. Trust us, your floors and your guests will thank you!
Visitor Overflow:
When you own a lake home, you’re suddenly the most popular person among your family and friends. As a result, your home is often overrun with visitors during the lake season.
An outdoor shower can help better accommodate these guests by being an alternative washing spot when indoor showers are occupied.
To ensure patrons are comfortable, be sure to enclose your outdoor shower with privacy walls and a equip it with a latch or locking mechanism.
For added convenience, outdoor showers can even be connected to your home’s hot water supply for a more enjoyable showering experience.
Adds Value to Your Home:
That’s right: an outdoor shower can ADD to the value of your lake home!
According to HGTV’s article, “Which Home Improvements Pay Off?,” adding a bathroom to your home can increase a home’s sale price by almost 9 percent.
While your outdoor shower won’t be a full bathroom, this additional space can still bump up your lake home’s value, even if only by a little.
Do it Yourself – How to Build an Outdoor Shower
Whether your outdoor shower is as simple as a water hose hanging from a tree, or as extravagant as an enclosed room with a waterfall shower head is up to you!
For something basic, all you need is the following materials:
- two extra-large hula hoops
- water-proof/resistant material
- a wooden pallet
- sewing materials
- 10 ft. of rope or cord
- a water hose
- water spigot access
- a tree with low-hanging limbs
- old-fashioned ladder
Construction Instructions:
- Take your waterproof/resistant material and sew it to one of the hula hoops, similar to sewing curtains around a dowel rod. Once completed, your material and hula hoop should resemble a tube.
- Next, secure the second hula hoop to the bottom of this tube. This will add a little weight to the bottom of the enclosure.
- Around the top opening of the enclosure, cut 4 holes large enough to slip your cord or rope through. These holes should be made slightly below the hoop itself, and spaced out like the points of a compass with one point at each direction.
- Take your rope or cord and cut it into fourths, with each fourth at the same length.
- You will next tie each rope to the top hoop through the four holes you previously made. Be sure these a tied securely to ensure your shower enclosure does not collapse while in use.
- After each rope is secured to the base, connect all four ends together, so that they make a peak from which you can hang the enclosure and slide the enclosure over a low-hanging limb. Be sure to choose a tree that in on a slight incline, if possible, to allow for better water run-off.
- Next, take your water hose, connected to the water spigot, and wrap it around the same limb so that it rests above the center of the enclosure’s open top.
- Take your pallet and place it under your hanging shower enclosure to serve as the platform on which users will stand to shower.
- Lastly, lean your old-fashioned ladder against the tree. This will be where your towels can hang until you are ready to dry off.
- Finally, your shower is ready for use!
For more outdoor shower ideas, explore these 32 beautiful DIY outdoor showers, and be sure to check out our other home improvement blogs here!

